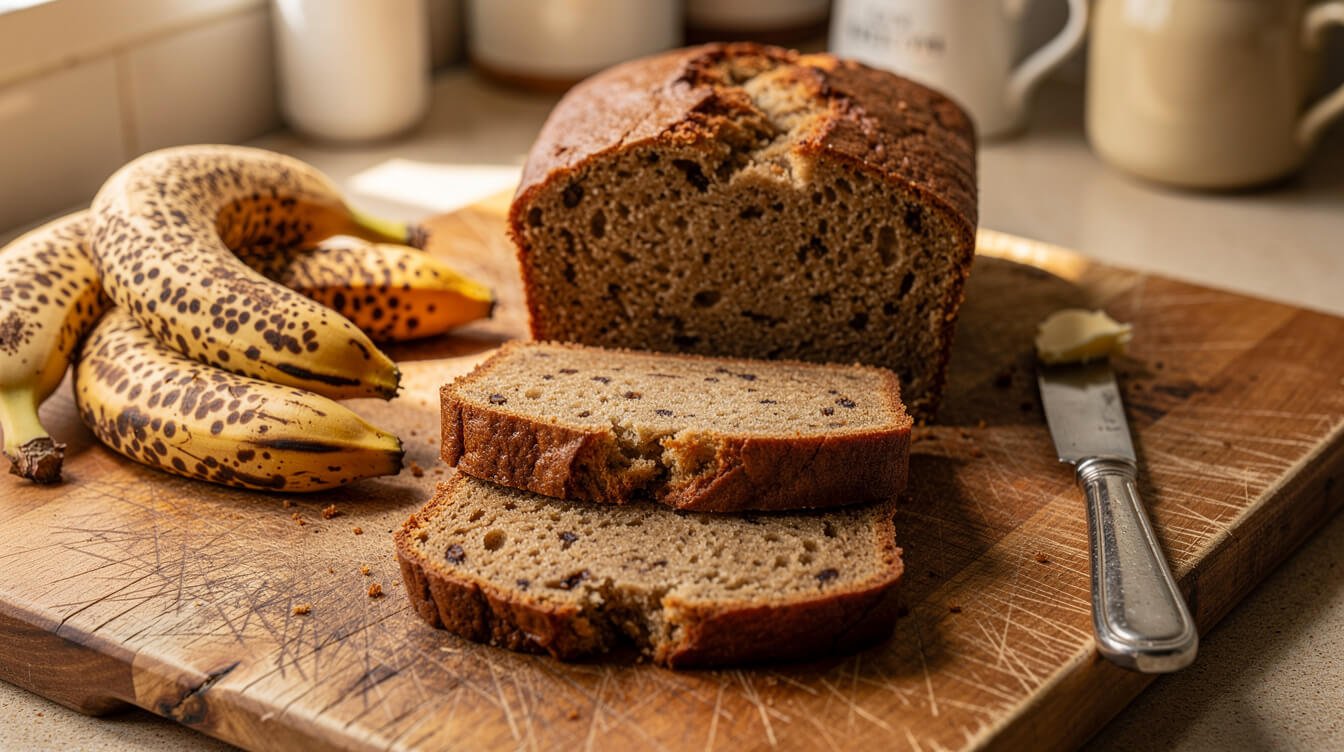
How to fix dense banana bread (slice it, and the crumb tells you which mistake you made)
You mashed the bananas, the kitchen smelled incredible for an hour, and then you cut into the loaf and found a short, heavy, slightly damp slab. Here’s the part nobody tells you about how to fix dense banana bread: there isn’t one fix, because “dense” isn’t one problem. It’s three different failures that all get called the same word, and they have three different causes.
Most troubleshooting articles hand you a list of fifteen maybes — overmixing, too much flour, bad bananas, wrong pan, oven too hot — and leave you standing over your loaf with no way to tell which one is yours. That’s not help. That’s homework.
So we’re going to do it backward. Slice the loaf, look at the crumb you actually have, and match it to one of three symptoms. Each symptom points at one cause and one fix. Then I’ll show you the check almost nobody runs, the five-minute habit that prevents all three, and what to do with the heavy loaf already sitting on your counter.
First, slice it — the crumb tells you which mistake you made
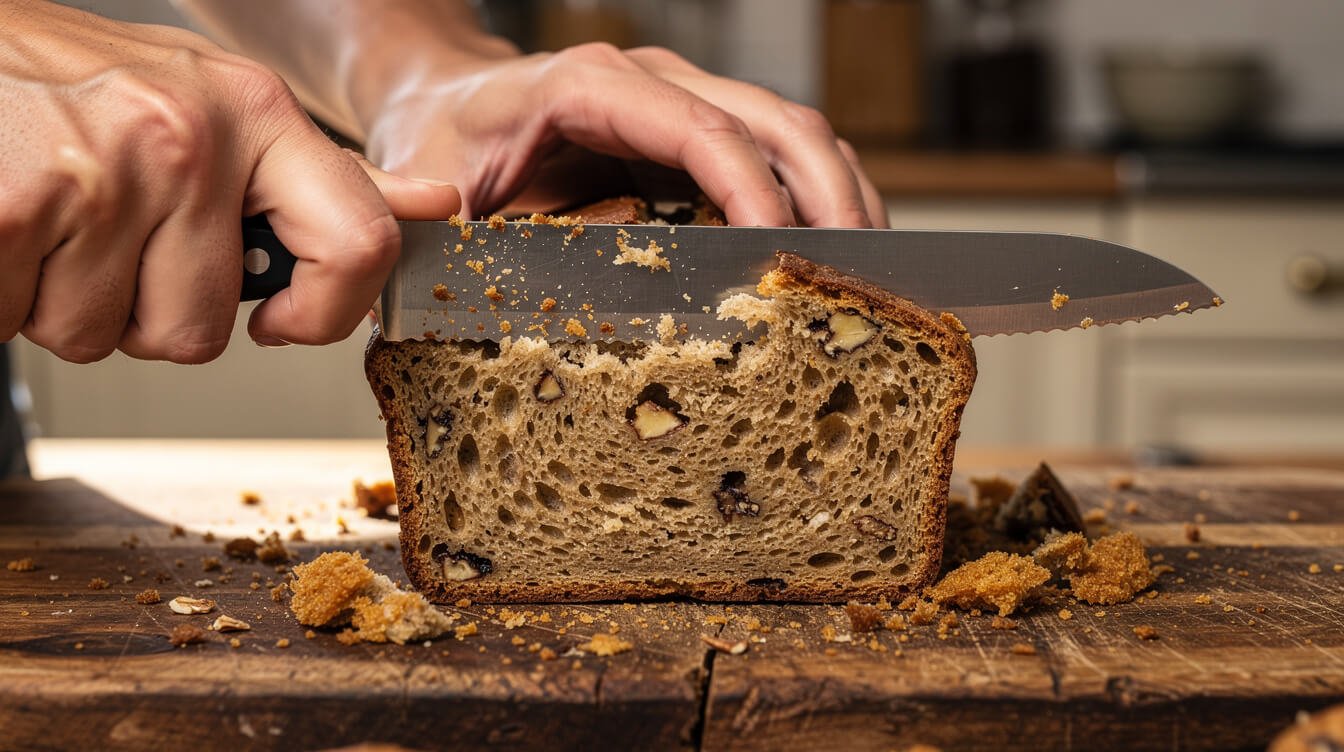
Wait until the loaf is cool, or close to it. This matters more than it sounds. A warm quick bread hasn’t finished setting; the starches are still firming up and the steam hasn’t redistributed through the crumb. Slice it at twenty minutes out of the oven and almost any banana bread looks gummy. Give it at least an hour on a rack and you’ll be judging the real thing.
Now cut a thick slice from the middle of the loaf — not the end — and stand it upright. Look at the cut face. You’re sorting into one of three buckets:
- A darker, wetter band along the bottom, with a more normal open crumb above it. That’s a wet streak, and it’s a doneness or a liquid problem.
- Uniformly tight, close, and heavy from bottom to top, with a short loaf overall. No wet band, no sinking — just compact everywhere. That’s flour or mixing.
- A sunken valley in the middle with the edges standing higher, sometimes with a crack or a collapsed crater. That’s leavening or oven handling.
Those three look different because they fail at different moments. The wet streak happens because the center never finished baking or there was too much liquid for the batter to carry. The uniformly tight crumb happens before the loaf ever hits the oven, in the bowl. The sunken middle happens in the oven, when the loaf rises and then loses its structure before it sets.
One more thing worth saying plainly: banana bread is a quick bread, not a yeast loaf. It is supposed to be moist and relatively close-grained. If you’re comparing yours to a slice of sandwich bread, you’ll always be disappointed. The target is tender and moist with a visible but fine crumb — not airy and full of holes. If your loaf is tender, moist, and tastes good, you may not have a problem at all.
Problem 1: a gummy, wet streak along the bottom
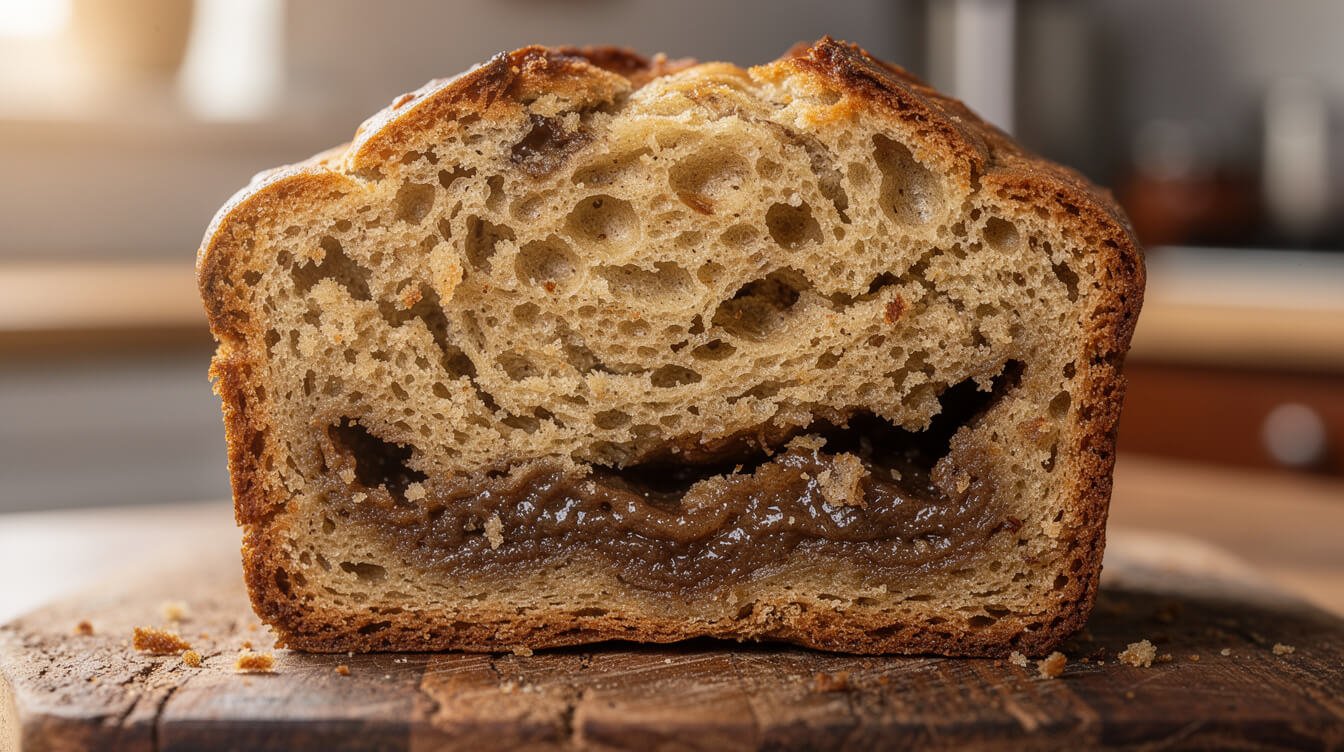
This is the most common complaint and the most commonly misdiagnosed. A dense wet band along the bottom third, with a decent crumb above it, almost always means one of two things: the loaf came out before the center was done, or the batter carried more liquid than it could support.
The doneness fix: stop using the toothpick alone
A toothpick is a blunt instrument in a loaf this wet. Mashed banana stays tacky, so a pick can come out looking clean-ish while the center is still batter, and it can come out smeared with banana while the loaf is perfectly done. The reliable test is temperature. A quick bread is baked through at about 200–205°F (93–96°C) in the center. Push an instant-read thermometer into the middle of the loaf, through the top crack, and read it. Under 195°F, it needs more time. That one number ends the guessing permanently — it’s the same approach we use in our easy moist banana bread recipe, where the doneness test is the whole point.
If your loaf is browning too fast on the outside to give the center time, drop the oven to 325°F (160°C) and bake longer. A lower, slower bake lets the middle catch up before the crust goes dark. Tent the top loosely with foil if it’s getting ahead of you.
The liquid fix: you probably used too much banana
Bananas are mostly water, and “three bananas” is not a measurement. A small banana and a large one can differ by half again in weight. Pile in three big ones and you’ve quietly added a meaningful amount of extra liquid to a batter that was balanced for less.
For reference: a medium banana mashes down to roughly 1⁄3 cup, around 75 g. So a recipe calling for three bananas is usually expecting about 1 to 11⁄4 cups, or 225–285 g, of mash. Measure it instead of counting fruit. If you’re routinely short on bananas rather than over, our banana bread recipe for two bananas is built around the smaller amount so you’re not improvising the ratio.
The same wet-streak logic applies to any quick bread, which is why it shows up in our no-yeast bread guide and in the gummy-center fix on our 4-ingredient banana bread. Fewer ingredients means every one of them is load-bearing.
Last liquid culprit: sour cream, yogurt, applesauce, or an extra egg added “for moisture.” Each one is more water going in. One of them is usually fine. Two is often the reason the bottom never set.
Problem 2: dense banana bread that’s heavy and tight all the way through
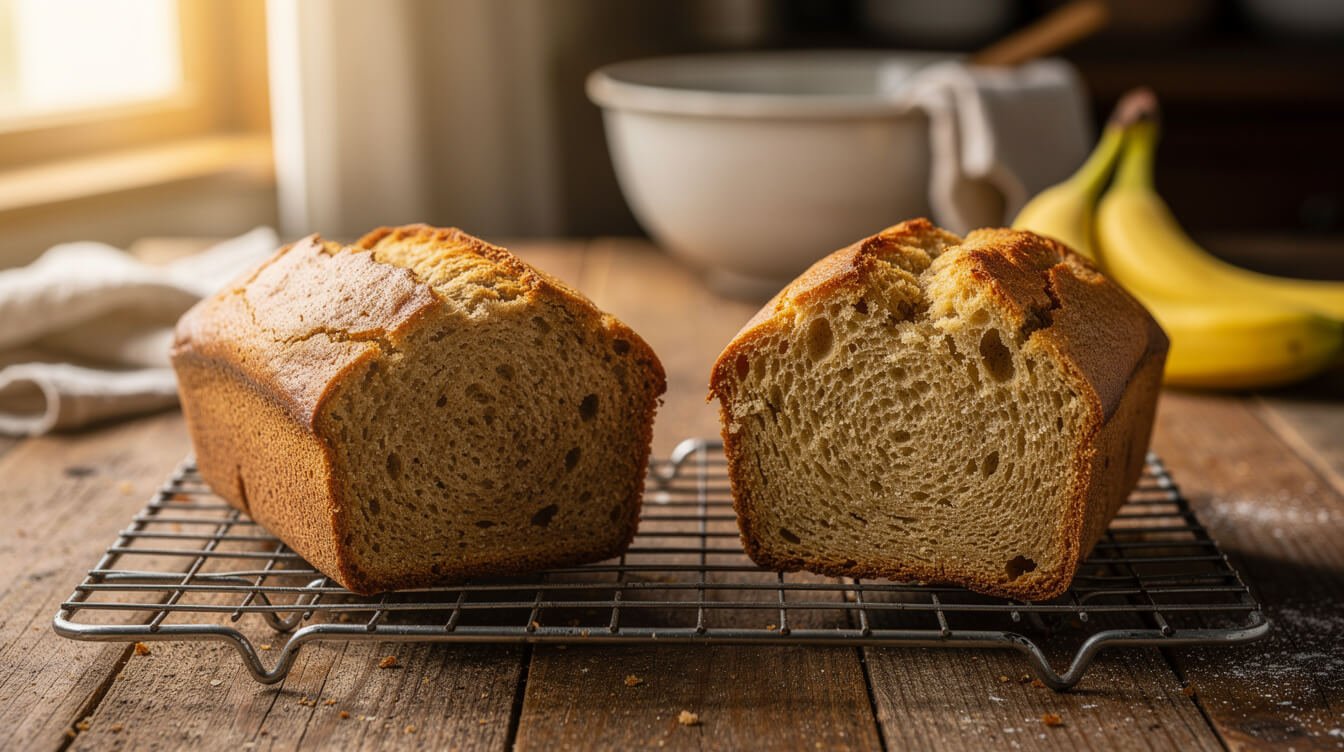
No wet band, no sunken middle — the whole loaf is just short, close, and heavy, like a brick with good flavor. This one is decided in the mixing bowl, and there are only two realistic suspects.
Suspect one: too much flour
This is the single most common cause of a uniformly dense loaf, and it happens to careful people. If you dip your measuring cup into the flour bag and scoop, you compact the flour on the way in. A cup of all-purpose flour should weigh about 120 g. Scooped straight from the bag it can come out at 150 g or more. Do that twice in one recipe and you’ve added nearly half a cup of extra flour without touching the recipe.
Two ways out. The better one is a scale — weigh the flour and the problem disappears forever. The no-scale version: stir the flour in its container to loosen it, spoon it lightly into the cup, and level the top with the flat back of a knife. Never pack it, never tap the cup on the counter.
Suspect two: you mixed it like a cake batter
Banana bread uses the muffin method, and the whole point of the muffin method is restraint. Whisk the wet ingredients together, whisk the dry ingredients together, then combine the two and stop as soon as the dry flour disappears. A few small lumps are not a defect — they’re the sign you did it right.
Keep going past that point and you develop gluten, which makes the crumb tough and tight, and you knock out the air the batter needs to rise. A stand mixer makes this very easy to overdo, because it’s so effortless that thirty extra seconds doesn’t feel like anything. For quick breads, a bowl and a spatula genuinely beat a machine. (If you’re weighing whether you need a mixer at all, that’s the honest conclusion in our guide to stand mixers for home cooks — some batters want one, and this isn’t one of them.)
Fold, don’t beat. That’s the whole trick.
Problem 3: a sunken middle with a raised rim
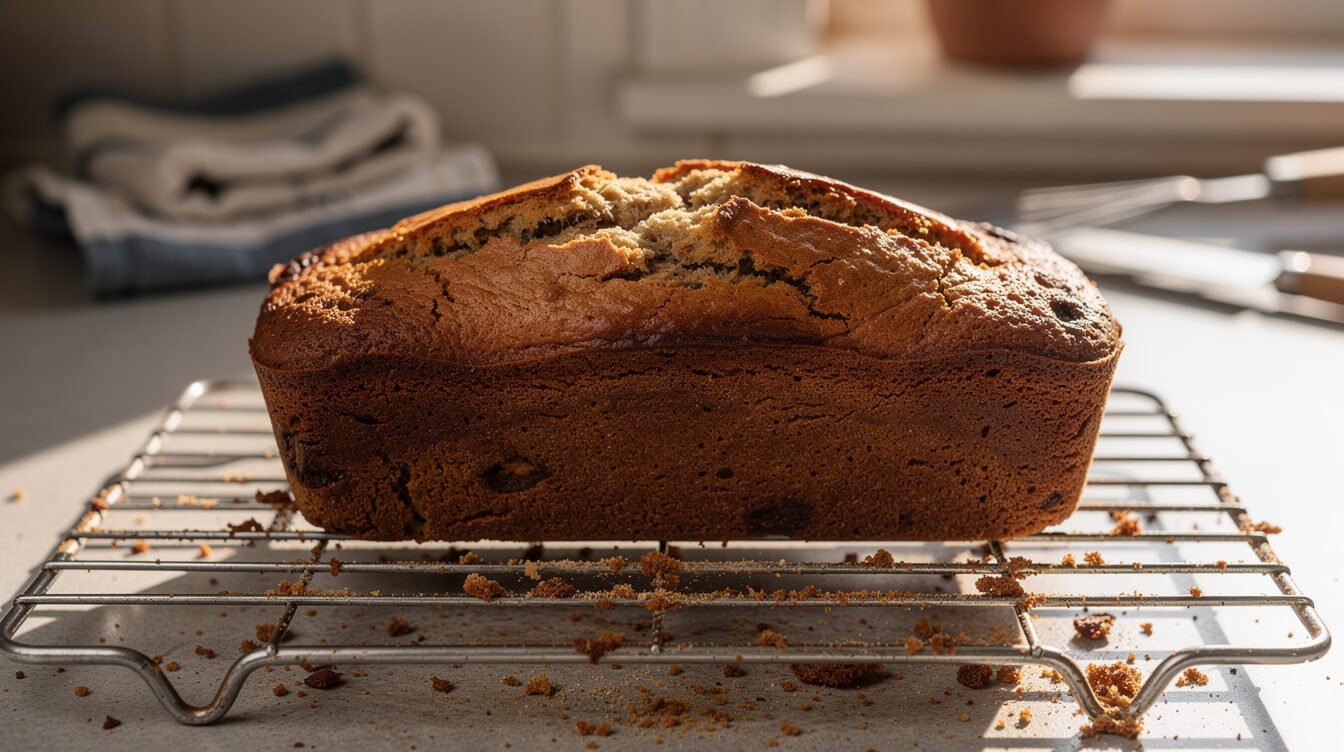
The loaf rose beautifully, you were proud of it, and then it fell in the middle and left a dense, compressed valley with the edges standing up around it. This is a structure problem: the loaf climbed before its walls could hold the height.
Your leavening is off in one direction or the other
Too little and it never rises enough to begin with. Too much is the one people don’t expect — an over-leavened batter inflates fast, stretches past what the structure can support, and collapses. If you’ve been adding “a little extra” baking soda to force a taller loaf, that’s very likely your sinking.
Pay attention to which leavener your recipe actually calls for, too. Most banana bread relies on baking soda, activated by the acid in the bananas and in any buttermilk, yogurt, or sour cream. Baking soda is several times stronger than baking powder, so they are not interchangeable spoon for spoon, and swapping one for the other by eye will reliably wreck the rise. Follow the recipe as written.
You opened the oven door
Peeking in the first two-thirds of the bake lets a rush of cool air hit a loaf whose structure is still liquid. The rise stalls, and the center drops. Leave the door shut until you’re genuinely near the end, then check fast. Use the oven light.
Your pan is too big
An 81⁄2 x 41⁄2-inch pan and a 9 x 5-inch pan are not the same pan. The 9 x 5 holds noticeably more, so the same batter spreads thinner, bakes faster at the edges, and gives you a flatter loaf that looks like it failed to rise even when the recipe worked perfectly. If your loaves always come out low, check your pan against what the recipe specifies before you change anything else.
Sinking and dense crumb follow the same logic in cakes, and the diagnosis runs in parallel — if you bake both, our guide on how to bake a cake that doesn’t sink, dry out, or turn dense covers the same mechanics with more room to spread out.
From the Eat Cafe kitchen
One good recipe a week, straight to your inbox
The recipe we're actually cooking this week, plus the one tip that saves it when it goes sideways. No spam. Unsubscribe anytime.
Three checks nobody tells you to run: your baking soda, your pan, and your oven
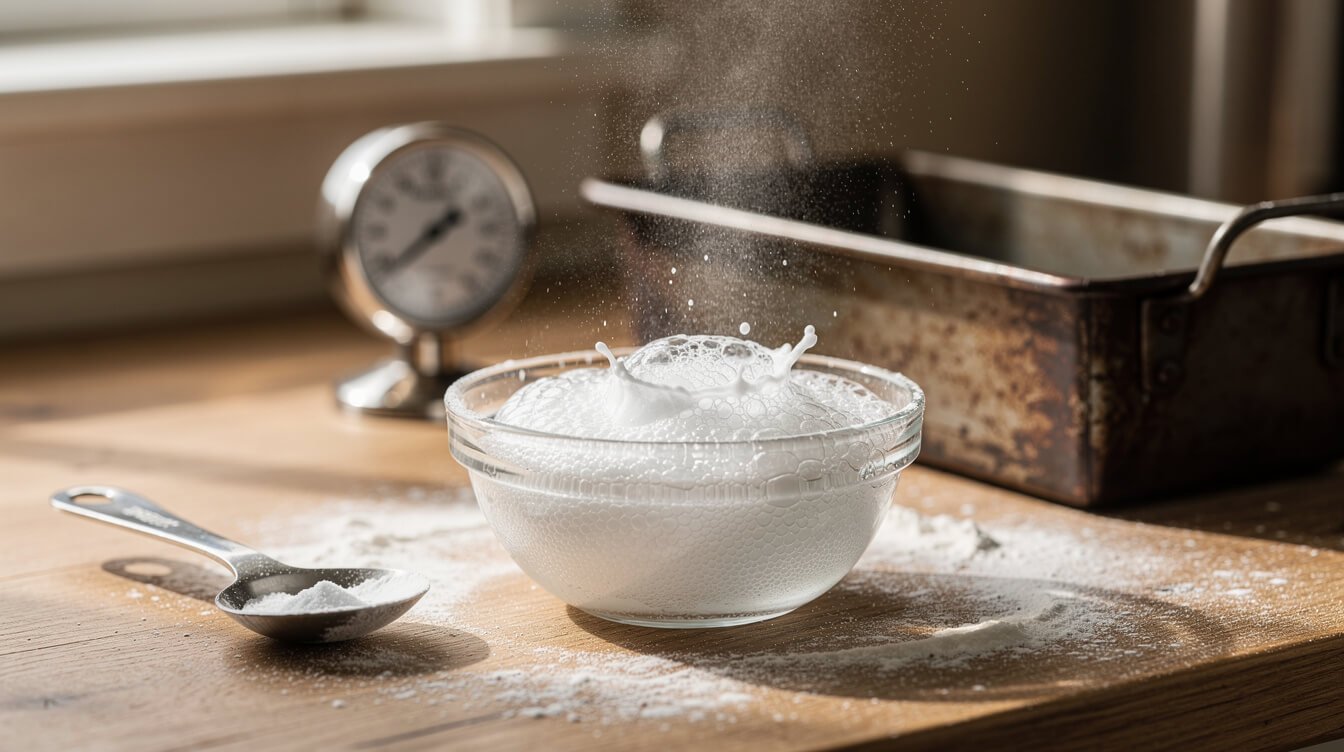
Here’s where almost every troubleshooting list on the internet leaves you hanging. It’ll tell you “incorrect leavening” is a possible cause and move on, without once suggesting you test whether the leavener in your cupboard still works. These three checks take about four minutes total and they rule out a surprising share of mystery failures.
Check 1: is your baking soda still alive?
Baking soda loses strength after it’s been opened, and most of us keep the same box for far longer than we’d admit. A rule of thumb is six months after opening, but don’t rely on the calendar — test it.
Put about 1⁄4 teaspoon of baking soda in a small bowl and add a splash of vinegar or lemon juice. It should fizz up immediately and vigorously. A lazy bubble or two means it’s spent, and no amount of technique will save a loaf leavened with dead soda. Replace it and keep the old box for scrubbing the sink.
Baking powder has its own version: drop 1⁄2 teaspoon into a few tablespoons of hot water. It should foam right away.
Check 2: what color is your pan?
Dark metal and dark nonstick pans absorb heat far more aggressively than light-colored aluminum or glass. The outside of the loaf sets and browns before the inside has risen, which gives you both a dark crust and a low, dense interior. If your pan is dark, lower the oven by 25°F (about 15°C) and expect a slightly longer bake. Nothing else needs to change.
Check 3: does your oven actually run at the temperature on the dial?
Home ovens drift, and plenty are off by 25°F or more in either direction. A cheap oven thermometer sitting on the middle rack tells you the truth in ten minutes, and it reframes a lot of baking problems at once. An oven running hot sets the crust early and sinks the middle. An oven running cool leaves you a wet streak no matter how long the timer says.
None of this needs an expensive kitchen — a scale, an instant-read thermometer, and an oven thermometer together cost less than one good knife. If you’re figuring out what’s actually worth buying first and what you can skip, our 100 Essential Tools Every Chef Has in Their Kitchen eBook and Guide walks through the gear that earns its drawer space, in the order we’d buy it.

The three tools that end most baking mysteries
A scale, an instant-read thermometer, and an oven thermometer fix more loaves than any recipe tweak. Our 100 Essential Tools Every Chef Has in Their Kitchen guide walks through what’s worth buying first, what can wait, and what you can skip entirely.
How to fix dense banana bread for good: weigh the bananas and the flour
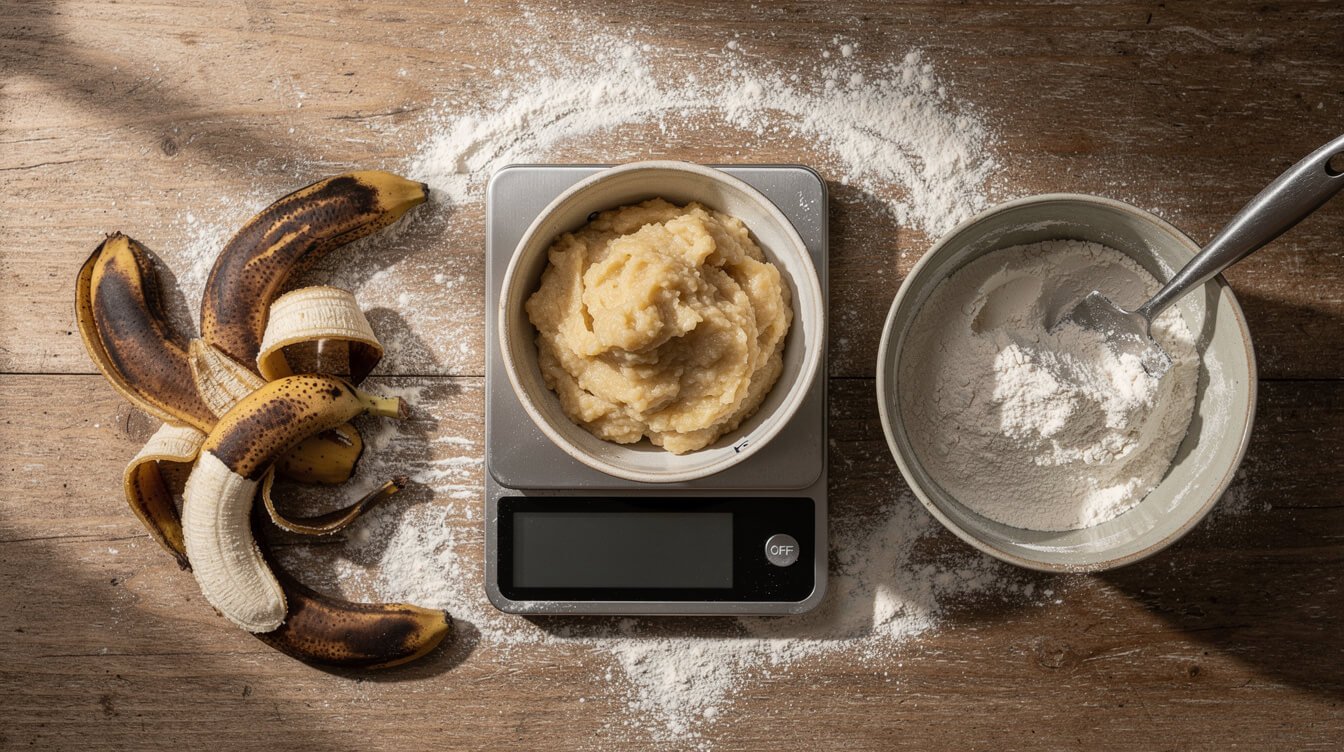
If you only change one thing after reading this, change this one. Two of the three problems above — the wet streak from too much banana, and the tight crumb from too much flour — are measuring problems wearing different costumes. A kitchen scale makes both of them stop happening.
It works because volume is a terrible way to measure the two ingredients that matter most here. Flour compresses. Bananas vary wildly in size. Cups measure space, not substance, so a cup of flour is whatever you packed into it and “three bananas” is whatever the store happened to have. Weight measures the actual thing.
The habit, in practice:
- Put the bowl on the scale and zero it. Mash your bananas straight into it and weigh the mash. Aim for the weight your recipe gives, or about 75 g per medium banana if it only counts fruit.
- Zero the scale again between dry ingredients. Spoon flour in until you hit your number — 120 g per cup for all-purpose if the recipe gives cups. Stop there even if it looks like less than you expected. It isn’t.
- Hold back a little liquid if your mash came in heavy. Over your banana target by 50 g or so? Take a tablespoon or two out of the milk. You’re keeping the total moisture where the recipe wanted it.
- Write the weights on the recipe. Once you’ve got a loaf you love, the numbers are yours. You can repeat it exactly next month instead of starting over.
Then run the short version of the pre-bake checklist: soda fizzes, pan matches the recipe, oven verified, wet and dry combined only until the flour disappears, thermometer in the center at 200–205°F before it comes out. That’s it. That’s the whole system, and it holds for every quick bread you’ll ever make.
Can you save a dense banana bread loaf you already baked? Three honest options
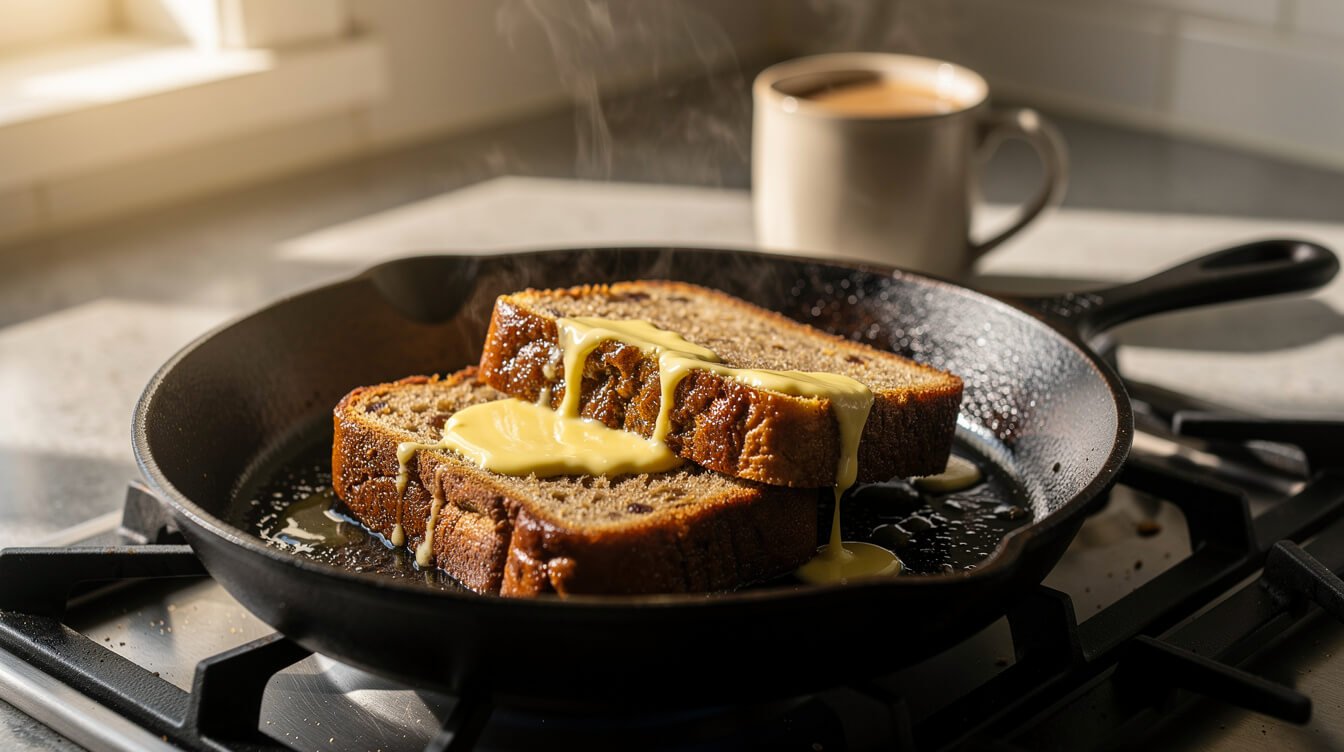
You can’t un-bake a loaf. Nobody can turn a dense one into a light one after the fact, and anybody promising otherwise is selling you something. What you can do is make it genuinely good to eat, which is a different and much more achievable goal. Three options, in the order we’d reach for them.
1. Griddle the slices in butter
This is the best one by a wide margin, and it’s especially good for a loaf with a gummy streak. Cut thick slices, melt butter in a skillet over medium heat, and toast each side until the edges caramelize and the surface crisps. The dry heat drives off some of that trapped moisture and firms up the dense band, and the caramelized sugar on the outside is better than anything the loaf was going to be on its own. Coffee, a fork, done.
2. Turn it into a banana bread pudding
Dense bread is ideal for this, because it holds its shape in custard instead of dissolving. Cube the loaf, whisk eggs with milk, a little sugar, and vanilla, pour it over, let it soak twenty minutes, and bake until the custard is set and no longer jiggles in the middle. Because it’s an egg custard, bake it through — 160°F (71°C) in the center is the safe doneness mark for egg dishes, and an instant-read thermometer settles it in seconds.
3. Crumble it into something else
Cube or crumble the loaf, toss the pieces with a little melted butter, and toast them on a sheet pan at 325°F until crisp. Now you have banana bread crumbs for the top of yogurt, ice cream, or baked fruit. Same trick we use for stale bread in our homemade garlic bread — heat, fat, and a little patience turn a disappointing loaf into a thing you’d choose on purpose.
One honest exception
If the center isn’t just dense but genuinely raw — wet batter, not damp crumb — don’t eat that part. Raw flour and raw egg both carry a real food-safety risk, so no tasting the middle to check. If the loaf is still warm, you can return it to the pan, tent it with foil, and bake until the center hits 200–205°F. If it’s fully cooled, re-baking mostly dries out the outside before the middle catches up; cube the done parts for option two and discard the raw core.
Frequently asked questions about dense banana bread
Why is my banana bread dense but fully cooked?
If the center reads 200–205°F and there’s no wet streak, you’re looking at a mixing or measuring issue rather than a doneness issue. Too much flour or too much stirring are the two causes, in that order. Weigh your flour next time and stop combining the moment the dry streaks vanish.
Is banana bread supposed to be dense?
Somewhat, yes. It’s a quick bread, so the target is moist and tender with a fine, close crumb — not airy and open like a yeast loaf. Plenty of “my banana bread is dense” worries are actually banana bread working correctly. If it’s tender, moist, and tastes good, it’s fine.
Can too much banana make banana bread dense?
Yes, and it’s one of the most common causes. Bananas are mostly water, so extra mash means extra liquid in a batter balanced for less — which usually shows up as a heavy, damp band near the bottom. Weigh the mash rather than counting fruit.
Should banana bread use baking soda or baking powder?
Most recipes call for baking soda, which is activated by the acid in the bananas and in any yogurt, sour cream, or buttermilk. Baking soda is considerably stronger than baking powder, so they can’t be swapped one-for-one. Use whichever the recipe specifies, in the amount it specifies.
What temperature should banana bread be when it’s done?
About 200–205°F (93–96°C) in the center of the loaf, measured with an instant-read thermometer. That’s far more reliable than a toothpick, because mashed banana stays tacky and will mislead you in both directions.
Why is my banana bread only dense in the middle?
That’s the underbaked pattern. The edges set while the center was still catching up. Drop the oven to 325°F so the heat has time to reach the middle, bake to temperature rather than to the timer, and check whether your pan is dark metal — if it is, come down another 25°F.
Will adding extra baking soda fix a dense loaf?
No, and it usually makes things worse. Over-leavened batter rises fast, outgrows its own structure, and collapses into a sunken, compressed middle. Extra soda also leaves a soapy, metallic taste. Test that your current soda still fizzes instead of adding more of it.
Does slicing it too soon make banana bread seem dense?
It genuinely does. The crumb is still setting and full of steam straight out of the oven, so a hot slice reads gummy even on a well-baked loaf. Cool it in the pan about 15 minutes, then move it to a rack and give it at least an hour before you judge it.
Final thoughts
Dense banana bread feels like a mystery because every list treats it like one. It isn’t. Slice the loaf, look at the crumb, and it tells you which of three things went wrong: a wet band means doneness or liquid, an evenly tight crumb means flour or mixing, a sunken middle means leavening or the oven.
Fix the one that’s yours, run the four-minute check on your baking soda and your oven, and start weighing the bananas and the flour. That’s a handful of small habits, and they’re the difference between hoping a loaf turns out and knowing it will.
And tonight’s heavy loaf isn’t a loss. Thick slices, hot butter, a skillet. Honestly, some of us like it better that way.

Before you go
Want the next one?
We post a new recipe or kitchen guide every day. The best of the week lands in one short email, no life story attached.