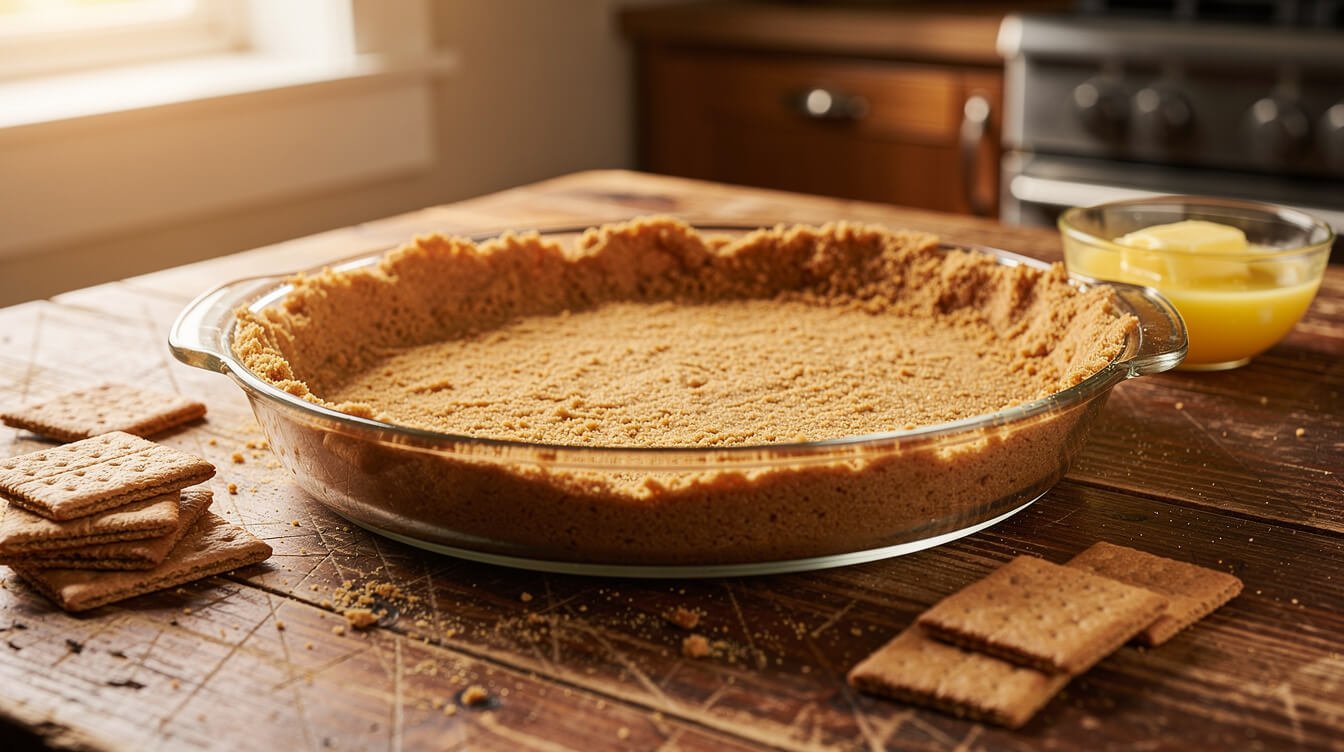
How to make graham cracker pie crust that holds together (and stays crisp under pumpkin pie)
Here’s how to make graham cracker pie crust that holds together: grind the crackers to fine sand, stir in sugar and melted butter, press it firmly into the pan with a measuring cup, and bake it for 8 to 10 minutes. That’s the whole recipe. The trouble shows up later, when a slice crumbles onto the plate, the crust welds itself to the pie dish, or the bottom turns to wet sand under a pumpkin pie.
So the recipe card is right below. After it come the things that decide whether your crust works: ratios by weight (because graham cracker boxes keep changing), which fillings need a pre-baked crust, how to keep a graham crust crisp under pumpkin and other custard pies, and a fix-it table for when it falls apart. If you need a rolled pastry crust instead, we’ve got a separate recipe for pie crust made with butter. This page is all about the crumb crust.
How to make graham cracker pie crust: the quick answer
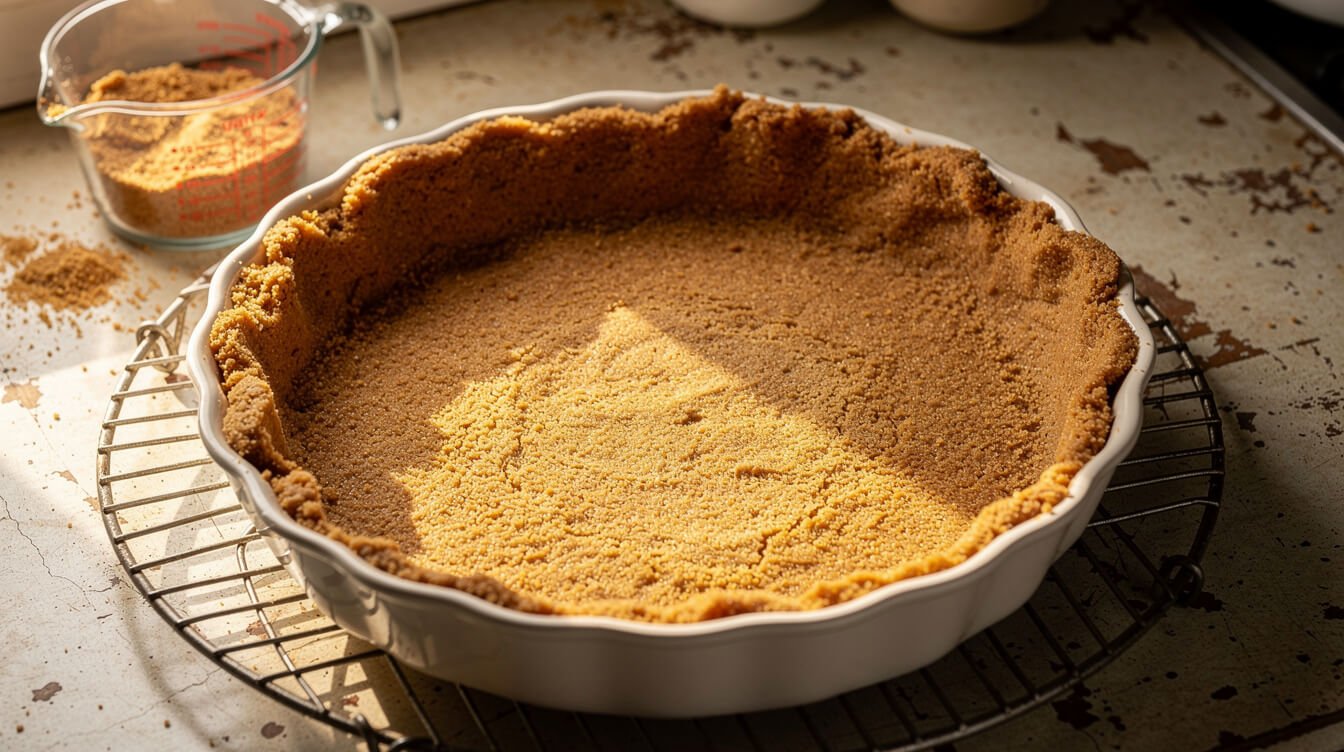
A graham cracker crust has three ingredients, and each one has a job. The crumbs are the structure. The butter is the glue while it’s warm and the set when it cools. The sugar isn’t only for sweetness: it melts in the oven and fuses the crumbs together, which is why a crust with no sugar tends to fall apart.
Graham cracker pie crust recipe (one 9-inch pie plate)
- 1½ cups (180 g) fine graham cracker crumbs, about 12 full sheets
- ¼ cup (50 g) granulated sugar (or packed light brown sugar)
- 6 tablespoons (85 g) butter, melted
- A pinch of salt if your butter is unsalted
- Heat the oven to 350°F (175°C), with a rack in the middle.
- Grind the crackers until they look like fine sand, with no pieces bigger than a lentil.
- Stir the crumbs, sugar, and salt together, then pour in the melted butter. Mix until every crumb looks damp and the mixture holds together when you squeeze a handful.
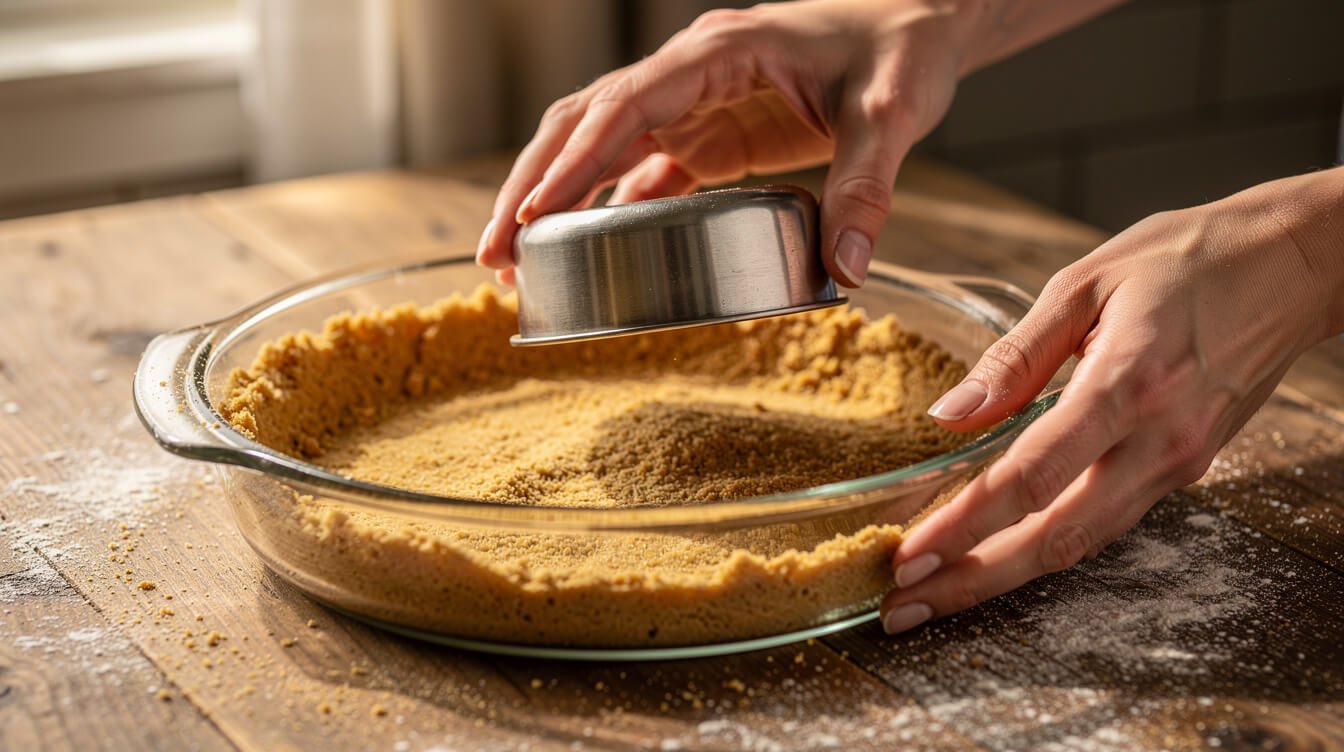
- Dump it into an ungreased 9-inch pie plate. Press it up the sides first, then across the bottom, using the flat bottom of a measuring cup.
- Bake 8 to 10 minutes, until it smells toasty and the edges are a shade darker.
- Cool it completely on a rack, about 30 minutes, before you fill it.
That’s it. If you only remember one thing, make it this: fine crumbs and firm pressure. Almost every crumbly-crust complaint traces back to one of those two.
Ingredients and ratios by weight (and why the cracker count lies)
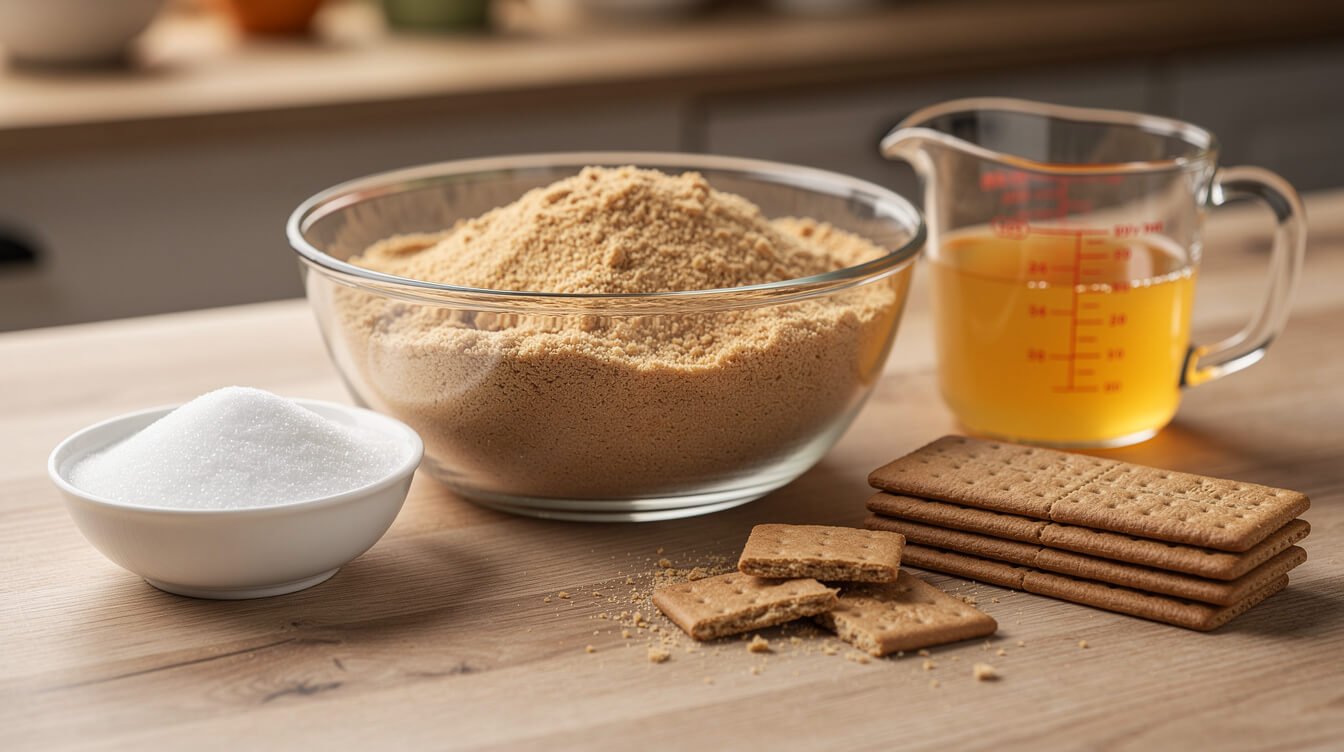
Most recipes tell you “12 graham crackers.” That works until the manufacturer quietly shrinks the sleeve, or you buy a store brand with thinner crackers. A full sheet usually weighs around half an ounce (about 15 g), but it varies. If you have a kitchen scale, weigh the crumbs. If you don’t, measure the crumbs in a cup after grinding, not the crackers before.
The ratio to remember
By weight, a good graham crust is roughly 2 parts crumbs to 1 part butter, with sugar at about a quarter of the crumb weight. Once you know that, you can scale to any pan:
| Pan | Crumbs | Sugar | Melted butter |
|---|---|---|---|
| 8- or 9-inch standard pie plate | 1½ cups (180 g) | ¼ cup (50 g) | 6 tbsp (85 g) |
| 9½-inch deep-dish pie plate | 2 cups (240 g) | ⅓ cup (65 g) | 8 tbsp (113 g) |
| 9-inch springform, bottom only (cheesecake) | 1¼ cups (150 g) | 3 tbsp (38 g) | 5 tbsp (70 g) |
| 9×13-inch pan, bottom only (bars, icebox desserts) | 2¼ cups (270 g) | 6 tbsp (75 g) | 9 tbsp (128 g) |
Butter: salted, unsalted, or brown
Either kind works. With salted butter, skip the pinch of salt. (Our guide to salted vs unsalted butter explains when the swap matters and when it doesn’t. Here, it barely does.) For a deeper, nuttier crust, brown the butter first and let it cool for 5 minutes before mixing. It’s the easiest flavor upgrade on this page.
Need it dairy-free? Melted coconut oil or a stick-style plant butter both bind crumbs well. Our butter substitute in baking guide covers which ones behave most like butter.
White sugar or brown sugar?
Granulated sugar gives the crispest, cleanest-snapping crust. Light brown sugar tastes more like caramel and makes a slightly softer, chewier crust, which is lovely under a no-bake cheesecake. Don’t cut the sugar to zero. It’s part of the glue.
How to make graham cracker pie crust step by step
1. Make fine crumbs (with or without a food processor)
A food processor gets you there in about 20 seconds of pulsing. No processor? Put the crackers in a zip-top bag, squeeze out the air, and roll a rolling pin (or a wine bottle, or a heavy can) back and forth until it’s sandy. Then shake the bag and roll again. It takes about 3 minutes.
Whichever way you go, check the texture. You want fine sand. A few pieces the size of a lentil are fine, but chunks the size of a pea make weak spots, and that’s where your slice will break.
Store-bought graham cracker crumbs (in the baking aisle) work too. They’re already fine and evenly ground, so you can skip this step entirely.
2. Mix until it’s like damp sand
Stir the dry ingredients first so the sugar spreads evenly, then add the butter and mix with a fork. The mixture should look like wet beach sand and hold its shape when you squeeze a handful. If it falls apart in your fist, add butter a teaspoon at a time. If it looks shiny and greasy, it has more butter than it needs. Add a couple of spoonfuls of crumbs.
3. Press it with a measuring cup, sides first
This is the step that makes or breaks the crust:
- Start with the sides. Push about a third of the crumbs up the sides with your fingers, aiming for a wall about ¼ inch thick. The most common mistake is thin sides that crumble when you serve.
- Then the bottom. Tip the rest into the middle and spread it out. Press it flat with the bottom of a dry measuring cup or a flat-bottomed glass. Lean in and press firmly, but you don’t need to crush it. It’s packed enough when the crumbs stop shifting under the cup.
- Round the corner. Run the edge of the cup (or the back of a spoon) around the bottom edge where the walls meet the floor. A curve instead of a sharp right angle keeps the sides attached to the base when you lift a slice out.
- Flatten the rim. Press down on the top edge of the wall with your thumb. A ragged, thin rim burns first.
4. Bake, then cool all the way
Bake at 350°F (175°C) for 8 to 10 minutes. It’s done when your kitchen smells like toasted graham crackers and the edges have darkened slightly. A crumb crust won’t look dramatically different when it’s done, so go by smell and that faint color change rather than waiting for it to look “golden.”
The crust will feel soft and a little loose when it comes out. That’s normal. The butter and sugar firm up as it cools. Let it cool completely on a wire rack, about 30 minutes, before filling. A warm crust under a cold or wet filling steams itself soft.
If you’re new to baking in general, the habits in our 10 baking basics every beginner should know (like an oven thermometer and an accurate preheat) help this crust as much as anything here.
Do you need to bake a graham cracker crust? Which fillings need it
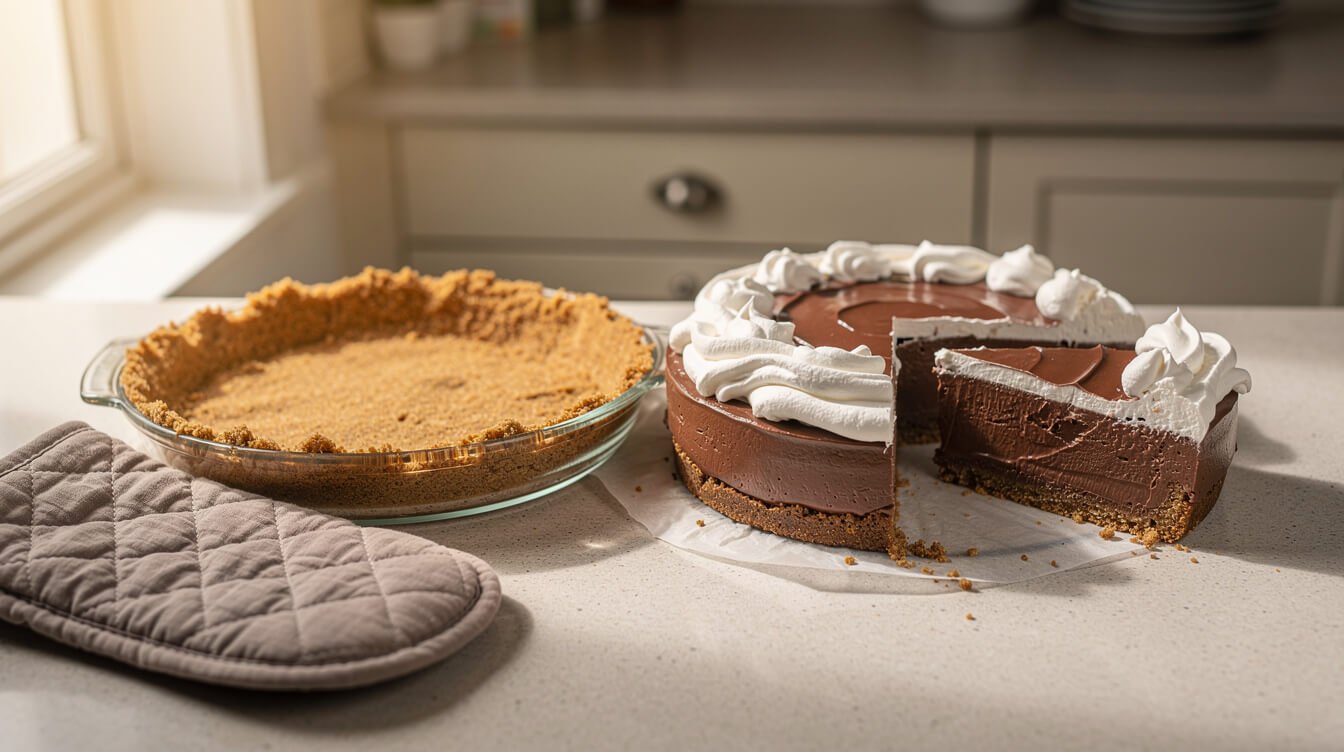
Short answer: you don’t have to, but it’s almost always better if you do. Ten minutes in the oven melts the sugar and fuses the crumbs, so a baked crust is crisper, toastier, and much easier to slice cleanly. An unbaked crust is held together only by cold butter, so it’s softer and gets softer the longer it sits under a filling.
| Filling | Bake the crust first? | Why |
|---|---|---|
| Pumpkin, sweet potato, or other custard pies | Yes, always | A wet filling soaks an unbaked crust before it can set. More on this in the next section. |
| Baked cheesecake | Yes | Pre-baking keeps the base from going pasty under a heavy, moist filling. |
| Baked key lime pie | Yes | Same reason. A pre-baked base stays crisp under a short bake. |
| Cooked pudding or cream pies | Yes, recommended | A baked crust holds up to a moist filling sitting in the fridge for a day or two. |
| No-bake cheesecake | Your call | Baked is crisper. Unbaked works if you chill the crust for 1 hour before filling. |
| Ice cream pie | Optional | The freezer holds an unbaked crust together. Freeze the empty crust 30 minutes first. |
If you skip the oven, chill the pressed crust for at least an hour (or freeze it for 20 to 30 minutes) before filling, so the butter firms up and holds the crumbs in place.
A note on no-bake fillings: choose ones that don’t use raw eggs, like no-bake cheesecake, cooked pudding, ice cream, or whipped cream fillings. The USDA advises against eating raw or undercooked eggs and specifically notes that chiffon pies made with raw beaten egg whites can’t be guaranteed safe. If an old family recipe calls for raw eggs, use pasteurized eggs or switch to whipped cream. (Our whipping cream vs heavy cream guide helps you pick the right carton.)
From the Eat Cafe kitchen
One good recipe a week, straight to your inbox
The recipe we're actually cooking this week, plus the one tip that saves it when it goes sideways. No spam. Unsubscribe anytime.
Graham cracker crust for pumpkin pie and other custard pies
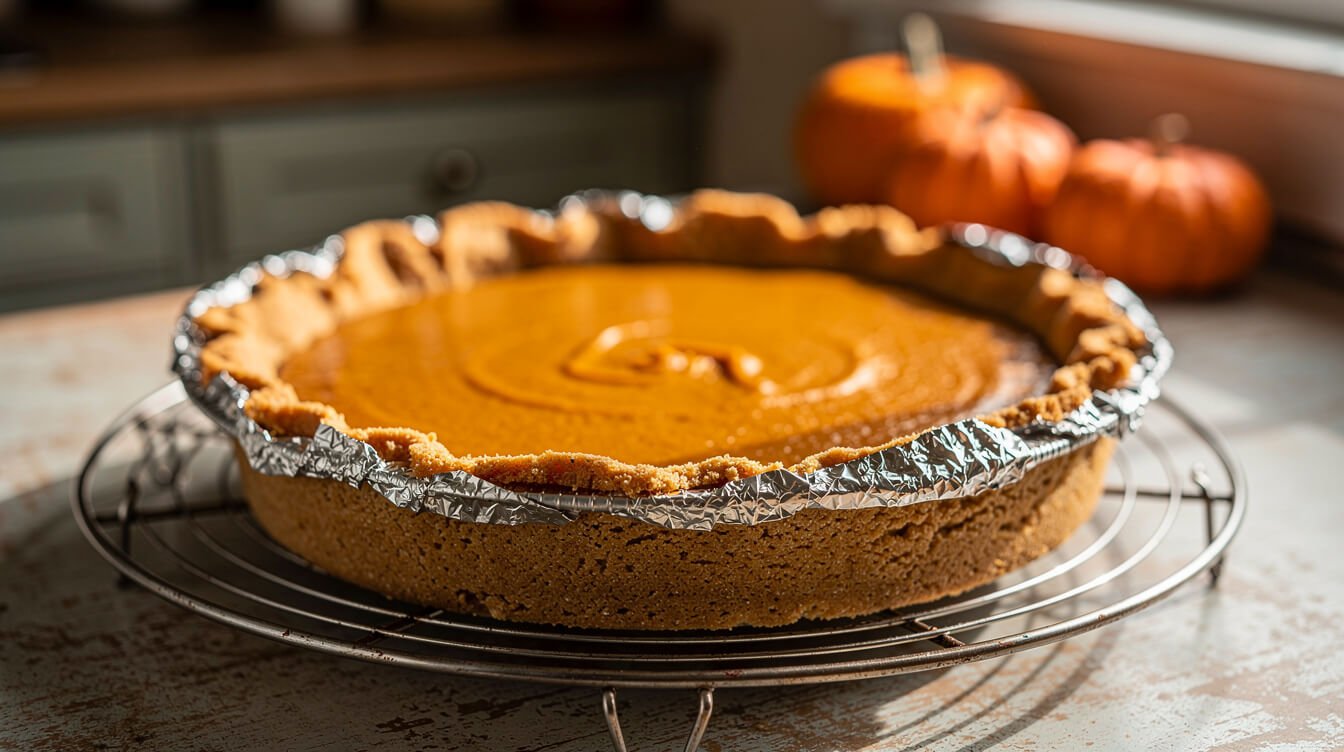
A graham crust under pumpkin pie is a great Thanksgiving shortcut: no rolling, no chilling dough, and the graham flavor goes beautifully with the spices. But it has two failure points that pastry crusts don’t: a wet bottom and scorched edges. Here’s how to avoid both.
Stop the soggy bottom
- Always pre-bake. Bake the empty crust 8 to 10 minutes and let it cool completely. This is not optional with a custard filling.
- Fill it right before it goes in the oven. Mix the filling while the crust cools, then pour and bake right away. Filling that sits in the crust soaks into it.
- Bake low. Put the pie on the lower-middle rack, ideally on a baking sheet that preheated with the oven. Heat from below helps set the bottom before the filling soaks in.
- Cool it on a rack, not on the counter. Air underneath keeps condensation from collecting under the crust.
Shield the edges
A graham crust has much more sugar in it than pastry, so it browns faster. That doesn’t matter in a 10-minute pre-bake, but it does in a pumpkin pie’s long second bake, where the exposed rim can go from toasty to bitter. After the first 20 to 25 minutes, lay a ring of foil (or a pie shield) loosely over the rim and leave it there until the pie is done. Fold a square of foil in quarters and cut out the center to make a ring.
A pie shield, a kitchen scale, and an oven thermometer are three of the cheapest tools that earn their drawer space with this recipe. If you’re kitting out a kitchen, our 100 Essential Tools Every Chef Has in Their Kitchen guide covers what’s worth buying first.
Make sure the filling fits
Many pumpkin pie recipes built around a 15-ounce can of pumpkin are written for a deep pastry crust. A graham crust in a standard 9-inch plate holds a bit less. Either use the deep-dish row in the ratio table above, or pour any extra filling into a small buttered baking dish and bake it alongside. A small dish finishes sooner, so check it early, using the same doneness test your pie recipe gives. Store-bought graham shells are often shallower still, so check that your filling fits before you pour.
Bake it the way your pie recipe says
The crust doesn’t change how the filling bakes. Follow your pumpkin, sweet potato, or custard pie recipe for oven temperature, time, and how to tell it’s done. The only changes for a graham crust are the ones above: pre-bake, fill and bake right away, and shield the rim.
Cool, then refrigerate
Pumpkin pie and other egg-custard pies belong in the fridge once they’ve cooled, not on the counter overnight. The USDA’s guidance on egg dishes is not to keep them out of the refrigerator for more than 2 hours. Its egg storage chart gives pumpkin and pecan pies 3 to 4 days in the refrigerator, or 1 to 2 months in the freezer after baking. The crust will soften a little each day in the fridge, so for the crispest slice, bake it the day before you serve it.
The same playbook (pre-bake, fill and bake right away, shield the edges) works for sweet potato pie, baked cheesecake, and key lime pie. For more on pre-baking crusts in general, including pastry, see how to blind bake a pie crust.

Know which tools are worth the drawer space
From the kitchen scale that makes this crust foolproof to the pie shield that saves its edges, our 100 Essential Tools guide walks through what a home kitchen actually uses, so you buy the useful stuff first and skip the gadgets.
Why your graham cracker crust falls apart (and how to get a clean slice)
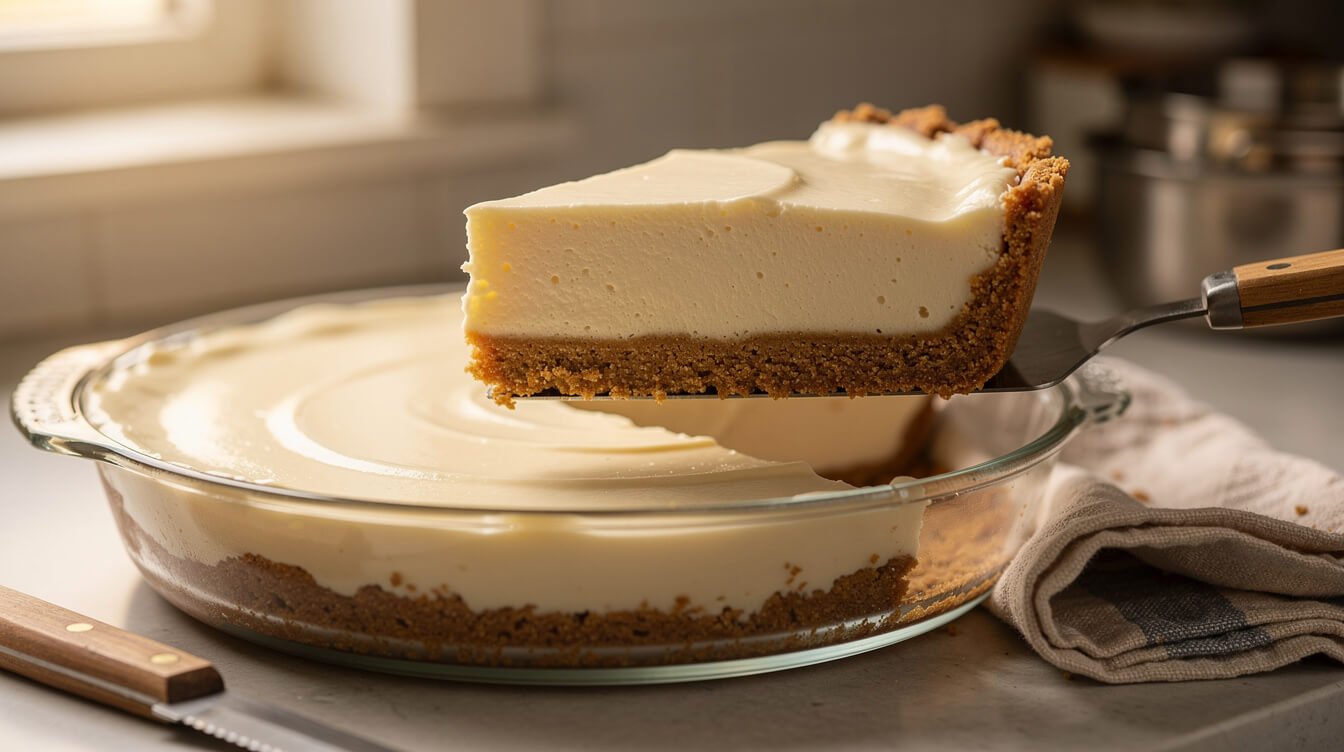
Find what you’re seeing in the left column. Most problems come down to one of four things: crumb size, butter amount, pressure, or temperature.
| What you see | Most likely cause | Fix it now | Next time |
|---|---|---|---|
| Crumbles when you slice it | Coarse crumbs, too little butter, loose pressing, or slicing it warm | Chill the pie another hour, then slice. Spoon any loose crumbs over the top of each serving and nobody will mind. | Grind to fine sand, weigh the butter, press with a measuring cup, and bake 10 minutes |
| Sides crumble but the bottom is fine | Sides pressed too thin | Serve with a spoon of whipped cream to hide the break | Press the sides first, about ¼ inch thick, and round the bottom corner |
| Sides slumped down in the oven | Loose sides, or the crust went in warm | While it’s still warm, gently push the sides back up with the back of a spoon | Press the sides firmly and chill the crust 15 minutes before baking |
| Hard as a rock | Packed with too much force, too much butter or sugar, or overbaked | Let slices sit at room temperature for 10 minutes before serving | Press firmly but don’t crush, and pull it when it smells toasty |
| Greasy, with butter pooled in the pan | Too much butter for the crumbs | Blot the hot crust gently with a paper towel | Weigh the butter, or start with 5 tablespoons and add only if it won’t hold |
| Soggy, wet bottom | Unbaked crust under a wet filling, a warm crust, or filling that sat before baking | Serve it cold. The bottom firms up a little in the fridge. | Pre-bake, cool completely, and fill right before the pie goes in |
| Dark or bitter edges | The rim browned during a long bake | Trim the darkest bits with a paring knife | Shield the rim with foil after 20 to 25 minutes |
| Bottom stuck to the pie plate | Butter and sugar caramelized onto the dish | Set the plate on a warm, damp towel for 5 minutes, then try again | Don’t overbake. A very light coat of butter on the plate helps too. |
How to get the first slice out clean
That first slice is the one everyone sees, and the one that usually falls apart. A few small habits fix it:
- Chill it fully. Cold butter is what holds the crust together. Give no-bake pies the full chill time their recipe calls for.
- Use a hot, dry knife. Dip a long knife in hot water, wipe it dry, and make each cut in one smooth press. Wipe and re-dip between cuts.
- Cut all the way through to the plate on both sides of the first slice, right into the center, so nothing’s still holding it in place.
- Warm the bottom. Set the pie plate on a warm, damp kitchen towel for a minute or two. That softens the butter at the base just enough to let go of the dish.
- Get under it. Slide a thin offset spatula or pie server flat along the bottom, press down gently against the plate, and lift.
Make-ahead, freezing, and swaps (Biscoff, Oreo, gingersnap, gluten-free)
Making it ahead
An empty graham crust, baked or unbaked, keeps well. Wrap it tightly and keep it in the fridge for up to 3 days, or the freezer for up to 3 months. That makes it a great job to knock out early in Thanksgiving week. If your pie plate is glass, let a frozen crust thaw in the fridge before it goes into a hot oven. Sudden temperature jumps are hard on glass bakeware.
Once the crust is filled, store the pie the way its filling needs, which for anything with eggs or dairy means the fridge (see the storage notes in the pumpkin section above).
Swapping in other cookies
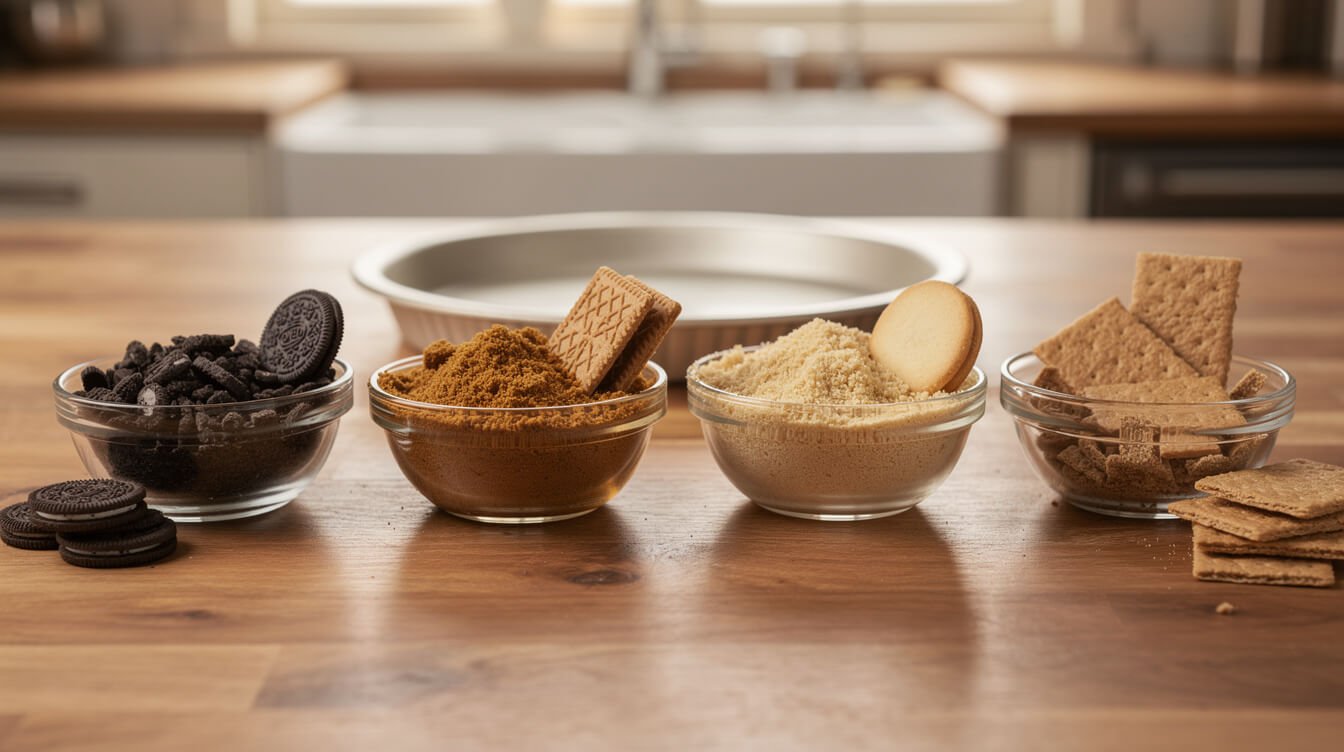
Any crisp, dry cookie or cracker can stand in for graham crackers. Soft or chewy cookies won’t give you a crisp crust. Keep the crumbs at the same weight (180 g for a 9-inch pie plate), then adjust the sugar and butter to match:
| Swap | Sugar | Butter | Good with |
|---|---|---|---|
| Chocolate sandwich cookies (Oreo style), ground filling and all | None | 4 to 5 tbsp | Peanut butter pie, chocolate cream, mint ice cream pie |
| Biscoff or speculoos cookies | None | 5 tbsp | Pumpkin cheesecake, cookie butter pie |
| Gingersnaps | 1 to 2 tbsp | 6 tbsp | Pumpkin pie, which is a natural pairing |
| Vanilla wafers | 1 to 2 tbsp | 5 tbsp | Banana cream, lemon, strawberry |
| Digestive biscuits | A little more than graham (about ⅓ cup) | 6 tbsp | Anything you’d use graham for. Bake a few minutes longer. |
| Pretzels | ¼ cup or more | 6 to 7 tbsp | Key lime, chocolate, salted caramel |
| Gluten-free graham-style crackers | ¼ cup | 6 tbsp | Same as regular graham crackers |
Two notes on swaps. Sweeter, richer cookies (Oreos, Biscoff) already carry sugar and fat, which is why they need less of both. And if you’re baking for someone who has to avoid gluten, use crackers labeled gluten-free and check every other ingredient and surface in the kitchen too. A crust is only as gluten-free as everything that touches it.
Small flavor upgrades
- A pinch of cinnamon or ginger in the crumbs for pumpkin or apple fillings
- Brown butter instead of plain melted butter
- 2 tablespoons of finely chopped pecans swapped in for 2 tablespoons of the crumbs
- A pinch of flaky salt pressed into the bottom before filling a chocolate pie
Looking for more holiday desserts to put that crust to work? Our pumpkin dump cake recipes are the no-crust route for busy weeks, and our Thanksgiving dinner ideas round up the rest of the table.
Graham cracker pie crust FAQ
Do you have to bake a graham cracker crust?
No, but baking it for 8 to 10 minutes at 350°F makes it crisper and much less likely to crumble. Skip baking only for no-bake or frozen fillings, and chill the crust at least an hour first. For pumpkin and other custard pies, always pre-bake.
How do you make graham cracker pie crust without a food processor?
Seal the crackers in a zip-top bag and crush them with a rolling pin, a wine bottle, or a heavy can until they look like fine sand. Shake the bag and roll again to catch the big pieces. Then mix and press as usual.
How many graham crackers do I need for a 9-inch pie crust?
About 12 full sheets, which makes about 1½ cups or 180 g of fine crumbs. Sheet sizes vary by brand, so if you can, weigh the crumbs or measure them after grinding.
What’s the 3:2:1 pie crust ratio, and does it apply here?
The 3:2:1 ratio (3 parts flour, 2 parts fat, 1 part water by weight) is for rolled pastry dough, not crumb crusts. For a graham crust, think roughly 2 parts crumbs to 1 part butter by weight, plus sugar.
Can I make graham cracker crust without sugar?
You can cut it to a tablespoon or two, but expect a more fragile crust. Sugar melts in the oven and helps bind the crumbs, which is why a sugar-free version tends to crumble. If your filling is very sweet, use less sugar rather than none.
Why is my graham cracker crust so crumbly?
Usually it’s crumbs that are too coarse, not enough butter, or not enough pressure. Grind finer, make sure the mix holds when squeezed, press firmly with a measuring cup, and bake it. Then chill the finished pie fully before slicing.
Can I use a store-bought graham cracker crust for pumpkin pie?
Yes. There’s no shame in a store-bought shell. Bake it empty for about 5 minutes to crisp it up, let it cool, and check that your filling will fit, since many are shallower than a standard pie plate. Bake it on a sheet pan, because thin foil pans flex when you move them.
Should I grease the pan for a graham cracker crust?
Usually not. The butter in the crust does the job. If your crusts tend to stick (glass and ceramic plates are the usual culprits), a very thin wipe of butter on the plate helps, and so does the warm-towel trick when serving.
The short version
That’s how to make graham cracker pie crust that works every time:
- Fine crumbs. Sand, not gravel. A zip-top bag and rolling pin work fine.
- Right ratio. 180 g crumbs, 50 g sugar, and 85 g melted butter for a 9-inch plate, or roughly 2:1 crumbs to butter by weight.
- Firm pressing. Sides first, about ¼ inch thick, then the bottom, with a measuring cup. Round the inside corner.
- A short bake. 8 to 10 minutes at 350°F, until it smells toasty. Then cool completely.
- For pumpkin and custard pies: pre-bake, fill right before baking, shield the rim after 20 to 25 minutes, and refrigerate once cool.
- For a clean slice: cold pie, a hot dry knife, and a warm towel under the plate.
It’s one of the easiest crusts you’ll ever make, and once you’ve pressed one, you’ll find a reason to make another. Start with a cheesecake, try a pumpkin pie next, then a pretzel crust under key lime when you’re feeling bold.

Before you go
Want the next one?
We post a new recipe or kitchen guide every day. The best of the week lands in one short email, no life story attached.