How do you make an apple crisp? The easy recipe, plus how to keep the topping crisp and the filling from going watery
How do you make an apple crisp that actually comes out crisp? You slice the apples evenly, toss them with a little sugar, spice, and thickener, cover them with a lumpy cold-butter oat topping, and bake until the juices bubble thick in the middle of the pan, not just at the edges. That last part is the one most recipes skip, and it’s why so many crisps come out soupy underneath a pale, soft lid.
This guide gives you a reliable 9×13 recipe, then the details that keep it from going wrong: how to build a topping that stays crunchy, how to tell it’s done, what to do when it isn’t, and how to make it ahead for a holiday without serving a soggy one. If you’re still standing in the produce aisle deciding which apples to buy, our guide to good apples for apple crisp covers that part in detail. Here, we’ll focus on everything after the apples come home.
How do you make an apple crisp? The whole idea in one minute
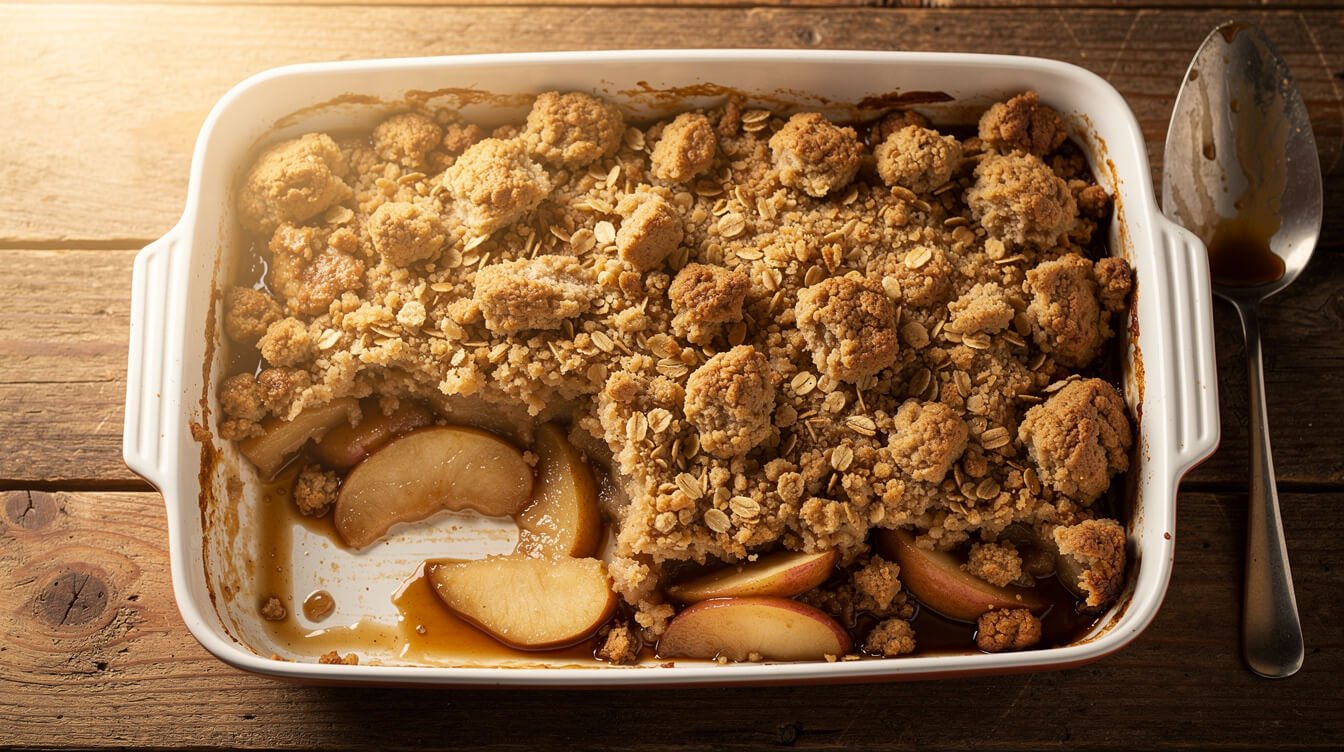
An apple crisp has two layers, and each one has a single job.
- The filling needs to turn tender and saucy without flooding the pan. That takes apples cut to an even thickness, a spoonful of flour or cornstarch to thicken the juices, and enough time in the oven for that thickener to actually work.
- The topping needs to bake up golden and crunchy in clusters. That takes cold butter worked into flour, brown sugar, and oats until the mixture is lumpy, not smooth, and then scattered loosely over the fruit.
Get those two jobs right and the rest takes care of itself. The full recipe is below, and the sections after it cover the topping, doneness, and fixes in more detail, so you can rescue any crisp, even one you’ve already baked.
What you need for apple crisp (and what each ingredient does)
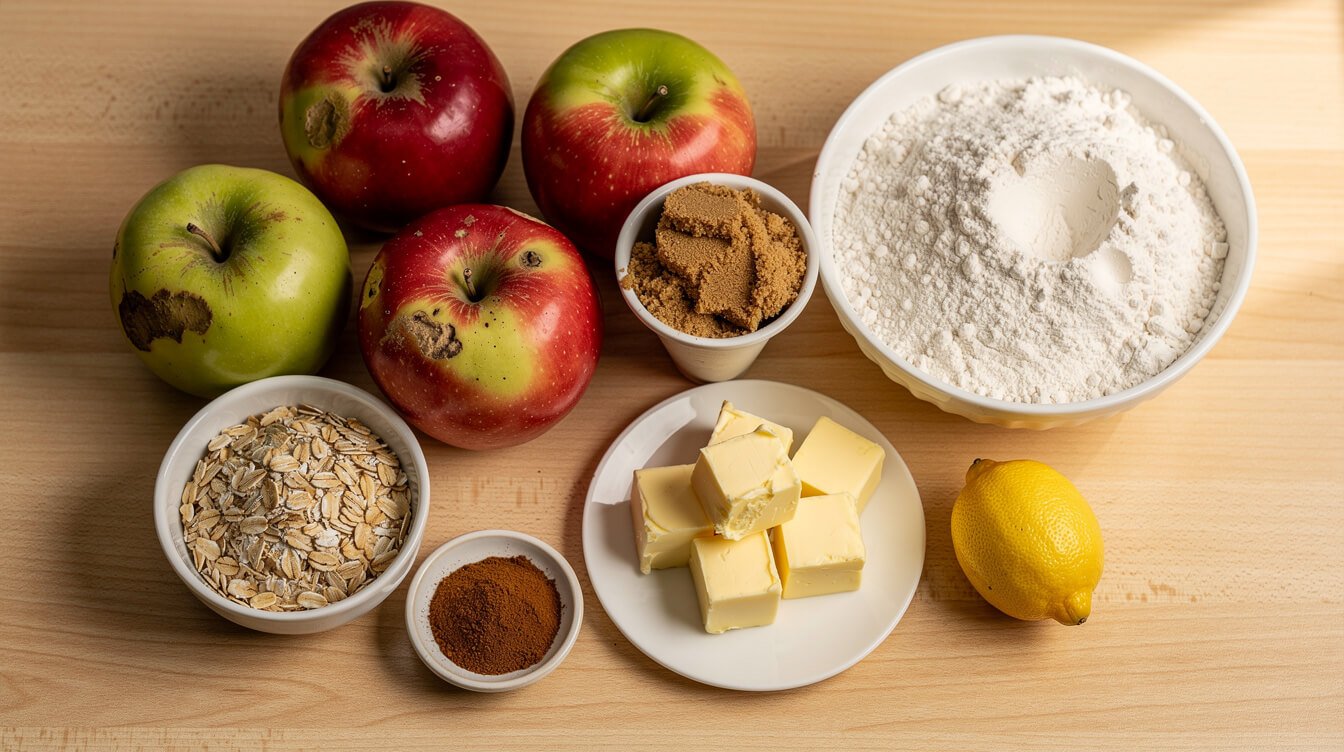
Most of these are pantry staples, and the same few ingredients show up in both layers. Knowing what each one does makes it a lot easier to swap things when you’re short on something.
For the filling
- Apples (3½ to 4 pounds, about 8 medium, or 10 cups sliced). Mix a firm tart apple with a sweeter one, like Granny Smith with Golden Delicious or Honeycrisp, for tender slices in a natural sauce.
- Brown sugar (⅓ cup / 65 g). Sweetens and adds a light caramel flavor. Use ¼ cup if your apples are very sweet, and up to ½ cup if you’re using all Granny Smith.
- All-purpose flour (3 tablespoons / 23 g) or cornstarch (1½ tablespoons). This is the thickener. Without it, apple juice pools in the bottom of the pan. Flour gives a slightly cloudy, soft sauce; cornstarch gives a clearer, glossier one. You need about twice as much flour as cornstarch for the same thickening.
- Lemon juice (1 tablespoon). Slows browning and keeps the filling from tasting flat.
- Cinnamon (1 teaspoon), nutmeg (¼ teaspoon), vanilla (1 teaspoon), and salt (¼ teaspoon). Salt is the one people skip, and it’s the reason some crisps taste one-note sweet.
For the topping
- All-purpose flour (1 cup / 125 g). The base that binds with the butter into crumbs.
- Old-fashioned rolled oats (1 cup / 85 g). They give the topping its chew and those craggy edges. Quick oats work, but they’re thinner and bake into a finer, softer topping. Steel-cut oats stay hard, so skip them here.
- Brown sugar (¾ cup / 150 g packed). Melts and caramelizes, which is what turns the topping golden and crunchy.
- Cold unsalted butter (10 tablespoons / 140 g), cubed. The most important ingredient in the topping, and its temperature matters more than its brand. More on that below. If you only have salted butter, use it and cut the topping’s salt to a pinch. Our salted vs unsalted butter guide explains the swap.
- Cinnamon (1 teaspoon) and salt (½ teaspoon).
- Optional: ½ cup chopped pecans or walnuts. Stir them in with the oats.
Gear: a 9×13-inch baking dish (about 3 quarts), a large bowl, a medium bowl, a sharp knife or peeler, and a rimmed sheet pan to set the dish on. A pastry blender is handy for the butter, but a fork or your fingertips work fine.
How to make an apple crisp, step by step
Makes: one 9×13-inch crisp, 10 to 12 servings. Prep: about 25 minutes. Bake: 45 to 55 minutes, plus 20 to 30 minutes to rest.
Step 1: Heat the oven and prep the pan
Heat the oven to 375°F (190°C) with a rack in the middle. Lightly butter a 9×13-inch baking dish. Line a rimmed sheet pan with foil or parchment and keep it nearby. Apple juices often bubble over the sides, and cleaning burnt sugar off an oven floor is nobody’s idea of fun.
Step 2: Make the topping first and chill it
In a medium bowl, whisk together 1 cup (125 g) flour, ¾ cup (150 g) packed brown sugar, 1 teaspoon cinnamon, and ½ teaspoon salt. Add 10 tablespoons (140 g) cold, cubed butter. Cut it in with a pastry blender or fork, or pinch it in with your fingertips, until the butter is in pieces about the size of peas with some bigger lumps. Stir in 1 cup (85 g) rolled oats (and nuts, if using), then squeeze a few handfuls so some of it holds together in clumps. Put the bowl in the fridge while you do the apples.
Making the topping first gives the butter time to firm back up, and cold butter is what makes crunchy clusters.
Step 3: Slice the apples evenly
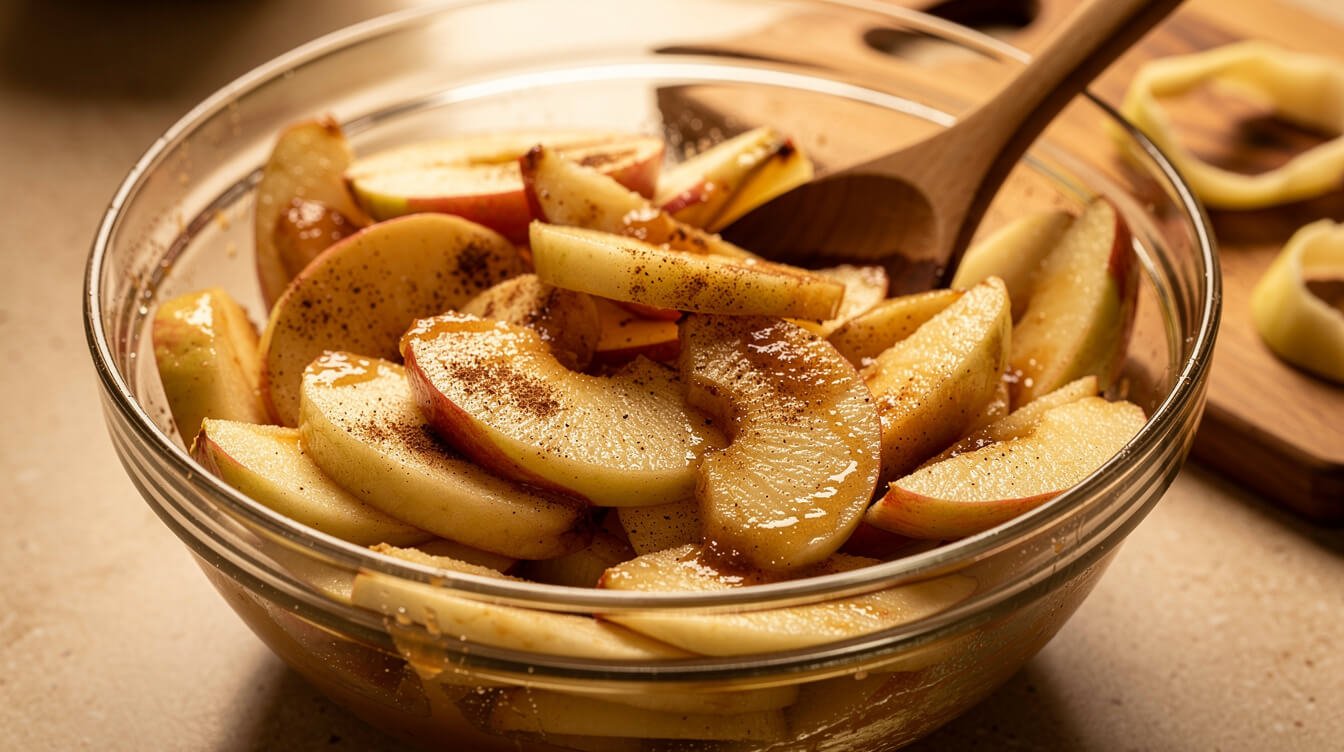
Peel and core about 8 medium apples, then slice them ¼ to ½ inch thick. The exact thickness matters less than keeping them the same. Mixed thicknesses are why one bite is mush and the next is still crunchy. Peeling is optional, but apple skins stay a little chewy after baking, so most people prefer them off.
Step 4: Toss the filling
In a large bowl, toss the apples with ⅓ cup (65 g) brown sugar, 3 tablespoons flour (or 1½ tablespoons cornstarch), 1 tablespoon lemon juice, 1 teaspoon cinnamon, ¼ teaspoon nutmeg, 1 teaspoon vanilla, and ¼ teaspoon salt. Make sure every slice gets a light coating. Spread them in the baking dish and level them so there are no big gaps or tall peaks.
Step 5: Top it loosely
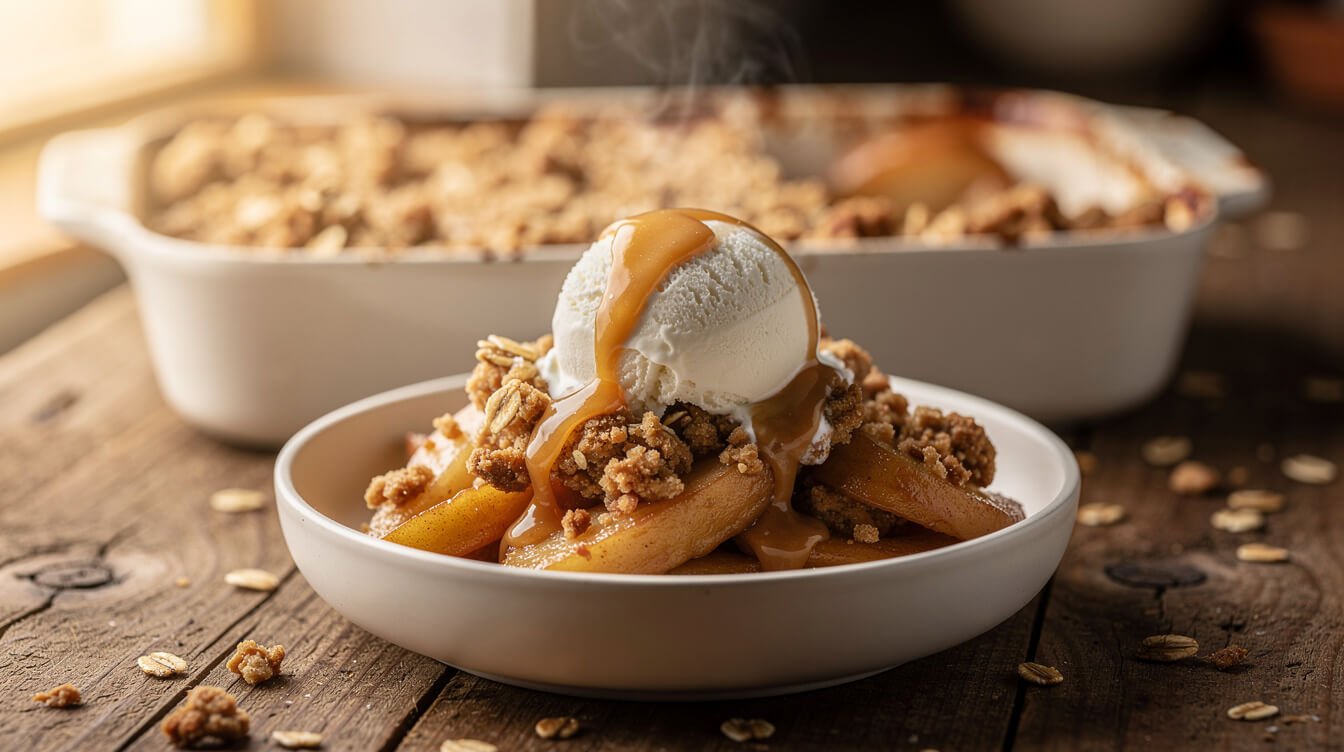
Scatter the cold topping evenly over the apples, right to the edges. Don’t press it down. A loose, uneven layer lets steam escape from the fruit, and the peaks and clumps are what brown and crunch. A packed layer steams from underneath and turns soft.
Step 6: Bake until the middle bubbles
Set the dish on the lined sheet pan and bake for 45 to 55 minutes. Start checking at 40. It’s done when all three of these are true:
- The topping is deep golden brown, not pale tan.
- Thick juices are bubbling up through the topping in the center of the dish, not just around the edges.
- A thin knife slides into the apples in the middle with little resistance.
Bake it uncovered. If the topping is browning faster than the filling is cooking, lay a sheet of foil loosely over the top and keep baking.
Step 7: Let it rest
Cool the crisp on a rack for at least 20 to 30 minutes before you serve it. The juices keep thickening as it cools, and King Arthur’s classic apple crisp notes the same thing: hot crisp is soft, and it firms up as it cools. Serve it warm with vanilla ice cream or a spoonful of whipped cream.
One food-safety note while you’re baking: don’t snack on the raw topping. Raw flour isn’t safe to eat until it’s baked, even when there are no eggs in the mix.
The topping: how to keep apple crisp crunchy, not soggy or sandy
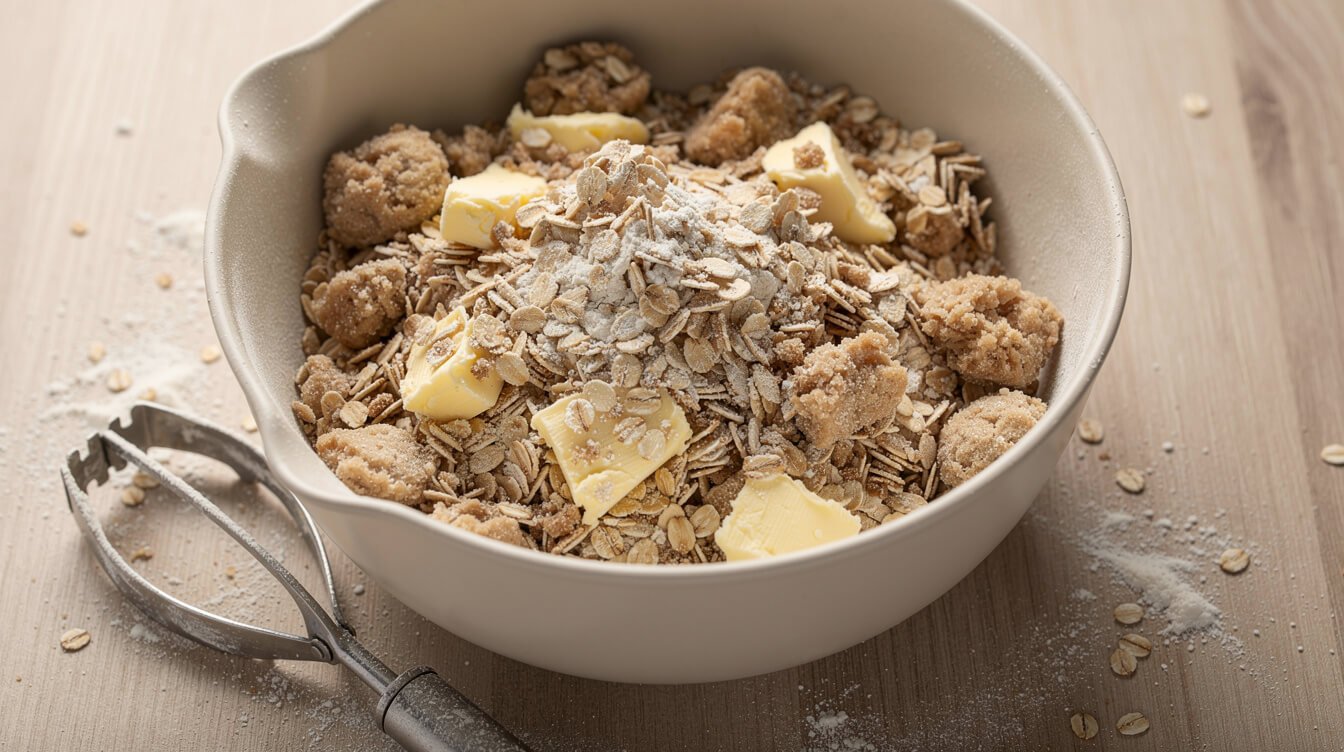
When an apple crisp disappoints, it’s usually the topping: soft, sunken, or dry and powdery. Here’s what controls it.
Cold butter makes crunch, melted butter makes chew
Lots of recipes use melted butter because it’s easy to stir in. It works, but it gives you a softer, cookie-like topping that doesn’t hold crunchy clusters. Cold butter stays in little pieces that melt in the oven and fry the flour and sugar around them, which is where the crunch comes from. Taste.com.au’s recipe developers made the same point in their piece on the mistake behind soggy crumble topping: use butter straight from the fridge, and leave the mixture lumpy rather than fine like breadcrumbs.
Neither is wrong. Melted butter suits a soft, chewy topping. For crunch, keep it cold, and chill the topping for 10 to 15 minutes if your kitchen is warm.
Add the oats after the butter
Cut the butter into the flour, sugar, and spice first, then stir in the oats. If you work the oats in with the butter, they break down and the topping turns mealy. Adding them last keeps them whole, so some get toasty and some stay chewy.
Squeeze it into clumps
Once the oats are in, grab handfuls and squeeze. Some will hold together in nuggets, and some will stay loose. That mix of sizes is what you want. Big clusters give crunch, loose crumbs fill the gaps, and nothing bakes into a flat sheet.
Scatter, don’t pat
Pressing the topping down to “seal” it traps steam from the apples underneath. That steam is the number one cause of a soggy underside. Scatter it loosely and leave the bumps.
Get the amount right
Too little, and the fruit pokes through and burns. Too much, and the layer stays raw underneath while the top darkens. This recipe gives about a ¾-inch layer over a 9×13. Love extra topping? Bake it on a separate parchment-lined sheet for 12 to 15 minutes and sprinkle it over servings.
From the Eat Cafe kitchen
One good recipe a week, straight to your inbox
The recipe we're actually cooking this week, plus the one tip that saves it when it goes sideways. No spam. Unsubscribe anytime.
Pan sizes, bake times, and how to tell your apple crisp is done
Apple crisp is forgiving about the pan, as long as you match the fruit to the size and go by the doneness cues, not the clock. Starting points at 375°F (190°C):
| Pan | Amount | Start checking at | Notes |
|---|---|---|---|
| 9×13-inch dish (3 qt) | Full recipe | 40 minutes | Usually done in 45 to 55 minutes |
| 8×8 or 9×9-inch dish (2 qt) | Half recipe | 30 minutes | Usually 35 to 45 minutes |
| 9-inch deep-dish pie plate | Half recipe | 30 minutes | Set it on a sheet pan. It bubbles over easily. |
| 10-inch cast iron skillet | About ⅔ recipe | 30 minutes | The iron browns the edges fast, so check early |
| Individual ramekins (8 oz) | About ¾ cup apples each | 25 minutes | Bake them on a sheet pan |
Why “bubbling in the center” is the cue that matters
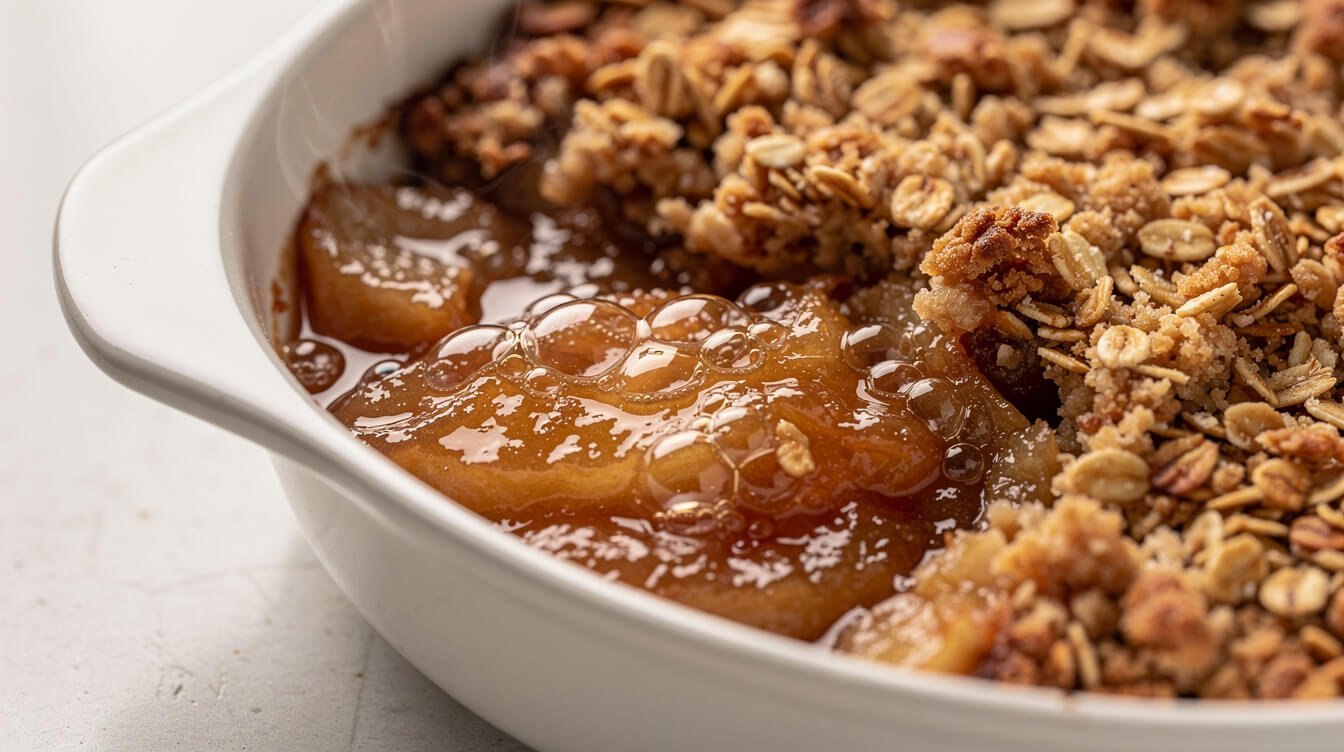
Flour and cornstarch don’t thicken much until the juices get hot enough to bubble. The edges of a pan heat first, so a crisp that’s bubbling only around the rim may still have thin, watery juice in the middle. Wait until you see thick, slow bubbles coming up through the topping in the center, too. Then you know the thickener has done its job all the way across.
Glass, ceramic, or metal
All three work. Glass and ceramic heat gently. Metal, especially dark metal and cast iron, browns the edges faster, so tent with foil near the end if needed. If you’re shopping for a skillet that can go from stovetop to oven to table, our guide to the best cast iron skillet brands walks through the options.
Apple crisp is one of those easy desserts that tends to show up at every fall potluck. If you’re the one who always brings it, the Eat Cafe Support Our Charities T-shirt is a cozy thing to bake in, and it helps support the kitchen, too.

A shirt for the one who always brings the apple crisp
The Eat Cafe Support Our Charities tee is a soft black cotton shirt with a small logo over the heart and a big one on the back. Wear it to the fall potluck, and help support the kitchen while you’re at it.
Why your apple crisp went wrong (and how to fix it)
Find what you’re seeing in the left column. Most problems trace back to one of four things: the apples, the butter, the thickener, or pulling it too soon.
| What you see | Most likely cause | Fix it now | Next time |
|---|---|---|---|
| Watery, soupy filling | No thickener, very juicy apples, or the center never bubbled | Let it rest a full 30 minutes, then spoon off extra juice. Or return it to the oven until the middle bubbles. | Use 3 tablespoons flour or 1½ tablespoons cornstarch, and bake until the center bubbles |
| Apples still crunchy, topping done | Slices too thick or uneven, or the oven runs hot | Tent with foil and keep baking until a knife slides in easily | Slice ¼ to ½ inch, all the same thickness |
| Filling turned to applesauce | Soft apples on their own (McIntosh, Red Delicious), or slices too thin | Call it apple crumble sauce and serve it over ice cream. Nobody complains. | Mix in a firm apple. See our apple guide. |
| Soggy, soft topping | Melted or warm butter, topping pressed down, or covered while warm | Bake uncovered at 375°F for 10 to 15 minutes to re-crisp | Use cold butter, chill the topping, and scatter it loosely |
| Dry, powdery flour patches | Butter not worked through the flour evenly | Dot the patches with a little melted butter and bake 5 to 10 more minutes | Work the butter in until no dusty flour is left |
| Topping burned before the fruit was done | Rack too high, a hot oven, or a dark pan | Scrape off the darkest bits and tent with foil | Middle rack, and tent with foil once the top is golden |
| Greasy topping that sank | Butter too soft, or mixed until smooth | Nothing to fix. It still tastes good. | Keep the butter cold and the mixture lumpy |
| Tastes flat or just “sweet” | No salt or lemon | A tiny pinch of flaky salt on each serving helps | Don’t skip the salt or the lemon juice |
| Bubbled all over the oven | Overfilled dish | Let the oven cool, then scrape up the drips | Leave ½ inch of headroom and bake on a sheet pan |
A little loose juice right out of the oven is normal. Judge the filling after 20 to 30 minutes of rest, not the second it comes out.
Making apple crisp ahead, storing it, and reheating it
The best make-ahead plan
- Up to a few days ahead: make the topping and keep it in a sealed bag or container in the fridge. You can also freeze it for a couple of months and scatter it straight from the freezer onto the apples. The butter stays cold that way, which is exactly what you want.
- The day of: slice the apples and assemble. Sliced, sugared apples sitting overnight release a lot of juice and brown, which gives you a wetter crisp.
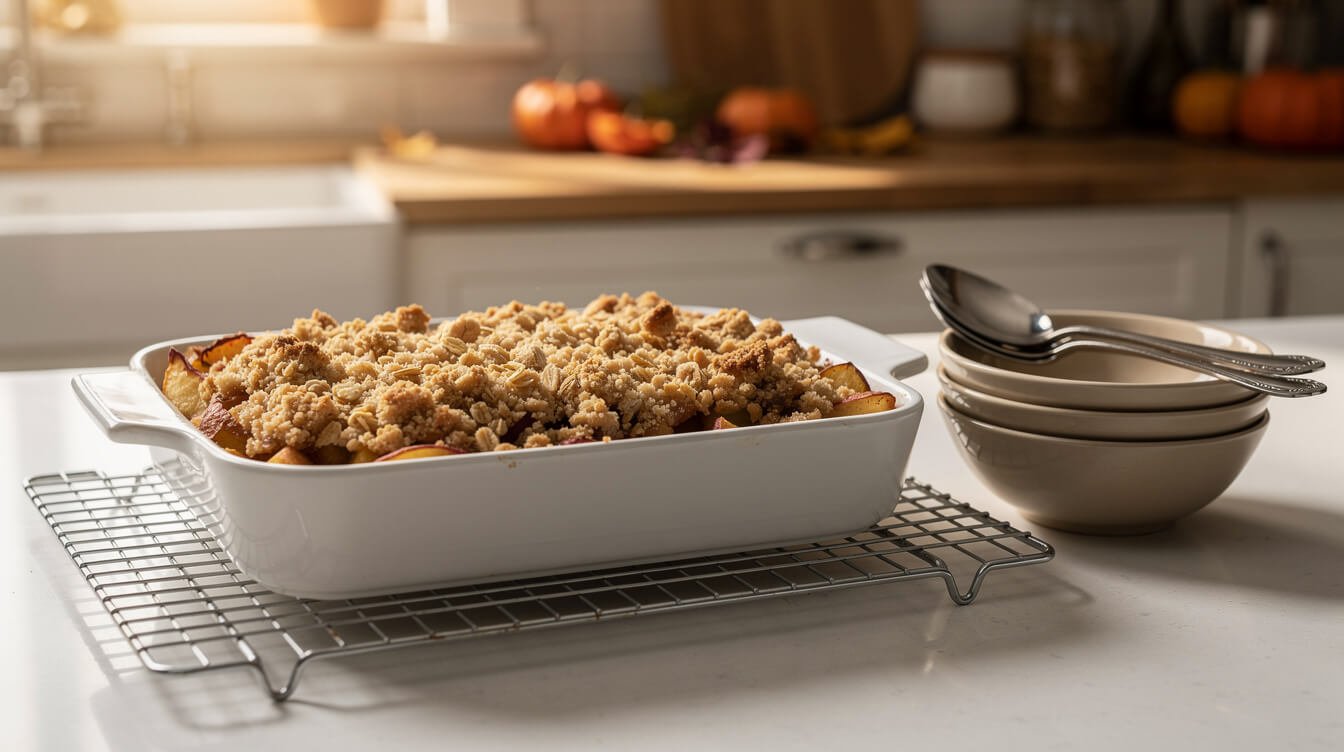
- Baking in the morning for a dinner: totally fine. Let it cool uncovered, then warm it at 350°F (175°C) for 15 to 20 minutes before serving to bring the crunch back.
How long apple crisp keeps
Cool the crisp completely before you cover it. Covering it warm traps steam, and that’s a fast route to a soggy top.
For storage, we follow USDA’s guidance for fruit pies made with sugar, since a crisp is built the same way: fruit, sugar, and a butter-and-flour topping, with no eggs or milk in the filling. As Iowa State University Extension’s AnswerLine explains, those can sit at room temperature for up to 2 days, then go in the fridge, loosely wrapped, for up to 2 more days. Some recipes online say a crisp keeps on the counter longer than that. We stick with the USDA numbers.
Two exceptions to keep in mind:
- If you used a sugar substitute, sugar isn’t there to help preserve the filling. Iowa State Extension recommends keeping those pies in the fridge and eating them within 1 to 2 days, so treat a sugar-free crisp the same way.
- Ice cream and whipped cream go on each serving, not on the pan. Once dairy is on top, it’s a perishable dessert and belongs back in the fridge within 2 hours.
Freezing apple crisp
A baked, fully cooled crisp freezes well for about 3 months for the best quality. Wrap it tightly in plastic wrap and foil, or freeze portions in airtight containers. Thaw it overnight in the fridge, then reheat uncovered in the oven to bring the crunch back.
Reheating
The oven is your friend here. Warm the crisp uncovered at 350°F (175°C) for 15 to 20 minutes for a whole pan, or about 10 minutes for a single serving (a toaster oven works well). The microwave is fine in a hurry, but it softens the topping.
Easy apple crisp variations
Once you have the base recipe down, it bends easily. Here are the swaps that work without changing the method.
Apple crisp without oats
Leave out the oats and bump the topping flour to 1½ cups (190 g). You’ll get a finer, more crumb-cake-like topping, closer to a classic British crumble. Keep the butter cold and the mixture lumpy, and it still bakes up crunchy.
Gluten-free apple crisp
Swap both the filling flour and the topping flour for a 1:1 gluten-free baking flour blend, or use cornstarch in the filling. For the topping, use oats that are labeled gluten-free. Regular oats are often processed alongside wheat, so they aren’t safe for someone who has to avoid gluten. If you’re baking for someone with celiac disease, check every label, including the spices and vanilla.
Dairy-free apple crisp
Use a plant-based butter that comes in sticks, not a soft tub spread, and keep it cold. Our butter substitute guide explains which swaps behave most like butter.
Apple cranberry crisp
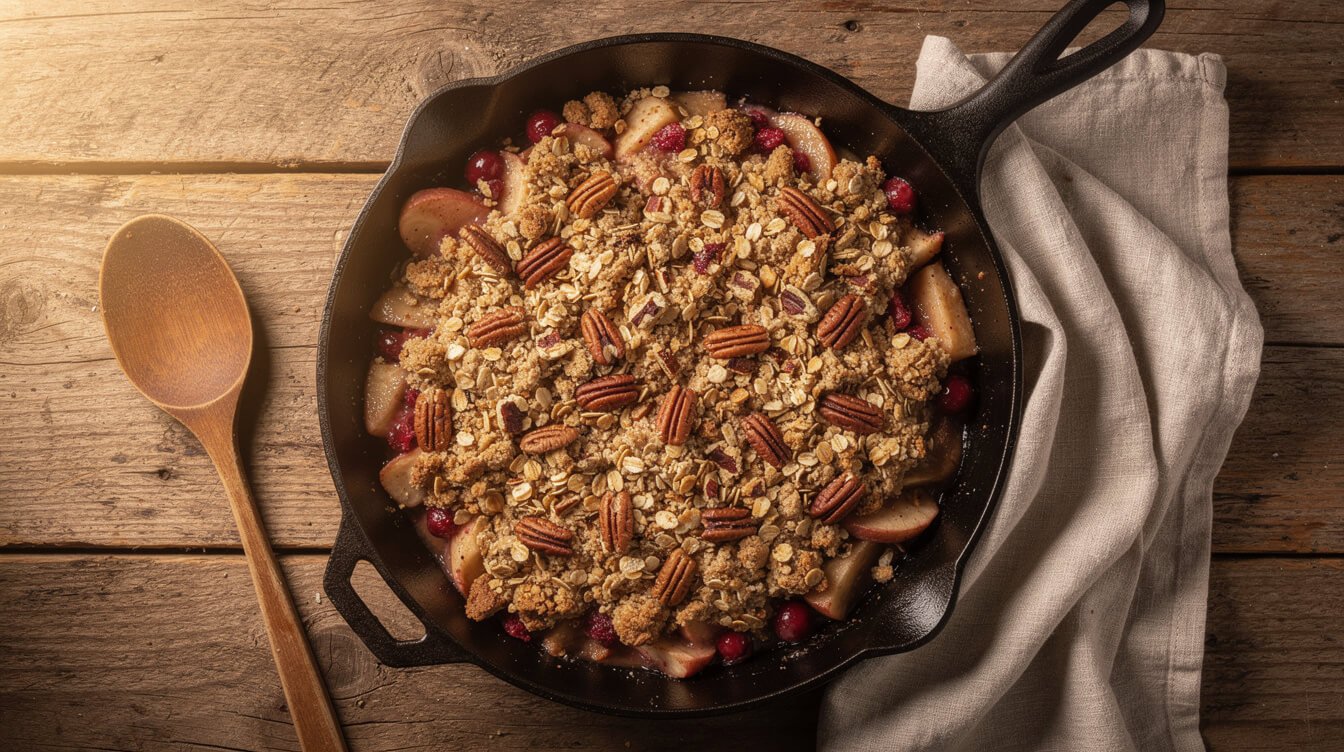
Swap 1 to 1½ cups of the apples for fresh or frozen cranberries, and add 2 to 3 extra tablespoons of sugar to balance their tartness. It’s gorgeous on a Thanksgiving table. If you have leftover berries, our cranberry sauce guide will use up the rest.
Nuts, caramel, or pears
Stir ½ to ¾ cup chopped pecans or walnuts into the topping with the oats, and tell your guests, since a crumble topping hides nuts well. For caramel apple crisp, drizzle a few tablespoons of caramel over the apples and cut the filling sugar a little. For apple pear crisp, use up to half firm pears and add an extra tablespoon of flour, because pears are juicier.
Apple crisp FAQ
How do you make an apple crisp with only a few ingredients?
The essentials are apples, sugar, flour, butter, and oats. Cinnamon, lemon, vanilla, and salt make it taste better, but if you’re missing one or two, the crisp still works. Don’t skip the flour in the filling, though. It’s what keeps the juices from pooling.
What’s the difference between an apple crisp, a crumble, and a cobbler?
In most American kitchens, a crisp has a streusel topping with oats, while a crumble is the same idea, usually without oats. The two names are often used interchangeably. A cobbler is different: it’s topped with biscuit dough or a batter that bakes into a soft, cakey layer. And if you want a bottom crust, too, that’s pie. Our butter pie crust recipe is a good place to start.
Can I use frozen apples?
Yes. Frozen slices release more liquid, so add an extra tablespoon of flour and expect a longer bake. Go by the bubbles in the center.
Why isn’t my apple crisp topping browning?
Usually it’s one of three things. The crisp was covered too long, the topping was pressed flat, or it just needs more time. Uncover it, move it to the middle rack, and give it another 10 minutes. Brown sugar in the topping also helps it color. If you swapped in white sugar, it will brown more slowly.
Can I make apple crisp the day before Thanksgiving?
Yes. Bake it, cool it completely, and keep it loosely covered at room temperature overnight. That’s well within USDA’s 2-day window for fruit pies. Rewarm it uncovered at 350°F (175°C) for 15 to 20 minutes before dessert. For the crunchiest results, make the topping the day before and bake the whole thing that morning. For the rest of the menu, our Thanksgiving dinner ideas roundup has you covered, and our pumpkin dump cake is another dessert you can make with almost no effort.
What should I serve with apple crisp?
Vanilla ice cream is the classic, and lightly sweetened whipped cream is lovely, too. Our guide to whipping cream vs heavy cream explains which carton to buy.
The short version
So, how do you make an apple crisp that turns out right every time? Slice the apples evenly, give the filling a spoonful of flour, and keep the topping cold, lumpy, and loose. Bake it until the juices bubble thick in the center, then let it rest before you dig in. Make the topping ahead when you’re busy, store it by USDA’s fruit-pie guidance, and re-crisp leftovers in the oven instead of the microwave.
That’s really all there is to it. It’s one of the easiest desserts you can bake, and it tastes like you worked a lot harder than you did.

Before you go
Want the next one?
We post a new recipe or kitchen guide every day. The best of the week lands in one short email, no life story attached.