Thumbprint cookies with jam: buttery cookies that keep their dent (and don’t crack or run)
You pressed a neat little well into every cookie, filled each one with jam, and 15 minutes later the dents had puffed shut, the jam had bubbled over the sides, and a few cookies had split right down the middle. That’s how thumbprint cookies with jam usually go wrong, and most recipes don’t tell you why. This one does. Below is a buttery, tender thumbprint that keeps its shape, and the three things that decide whether it works: an egg-yolk dough with no leavening, a short chill, and a second press halfway through the bake.
The full recipe comes first, so you can just bake if you want to. After that you’ll find which jams hold up in the oven (and which run), a troubleshooting table for cracked, flat, or dent-less cookies, easy swaps, and a make-ahead plan for cookie trays and swaps.
Thumbprint cookies with jam: the recipe (and why it uses only yolks)
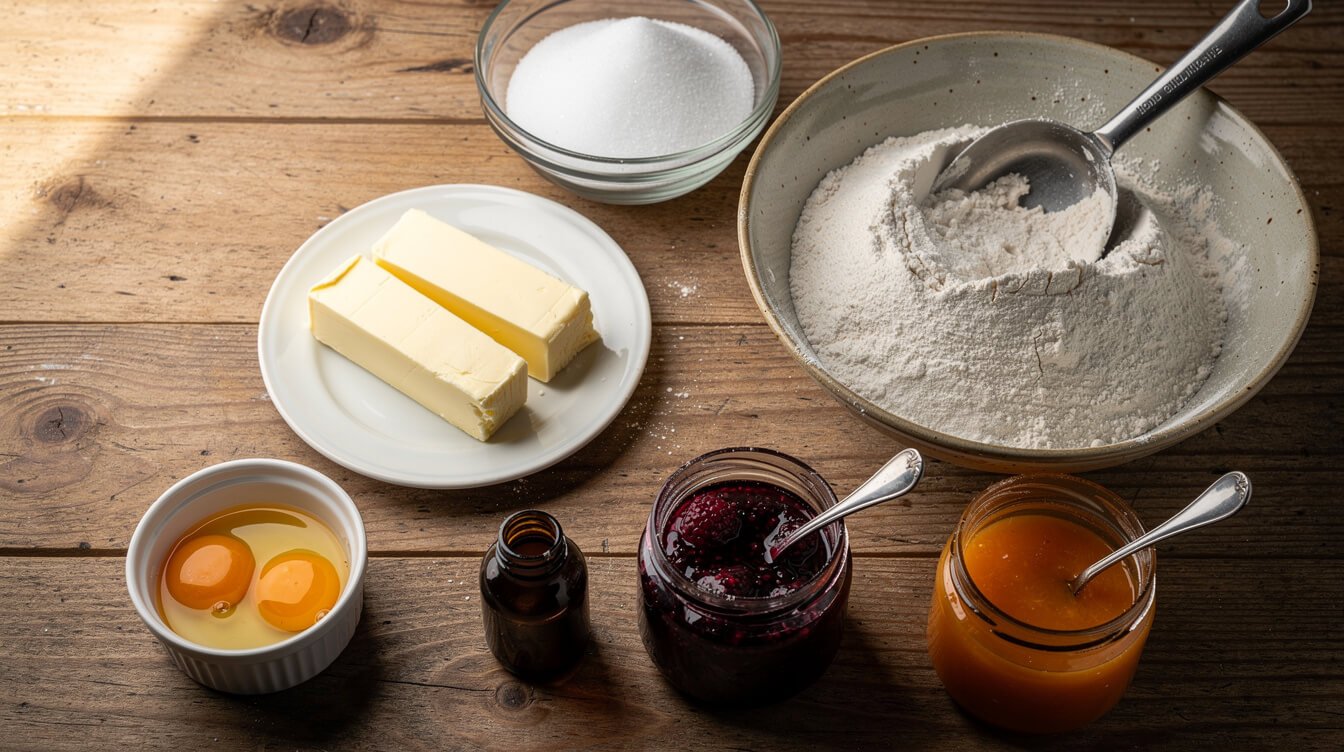
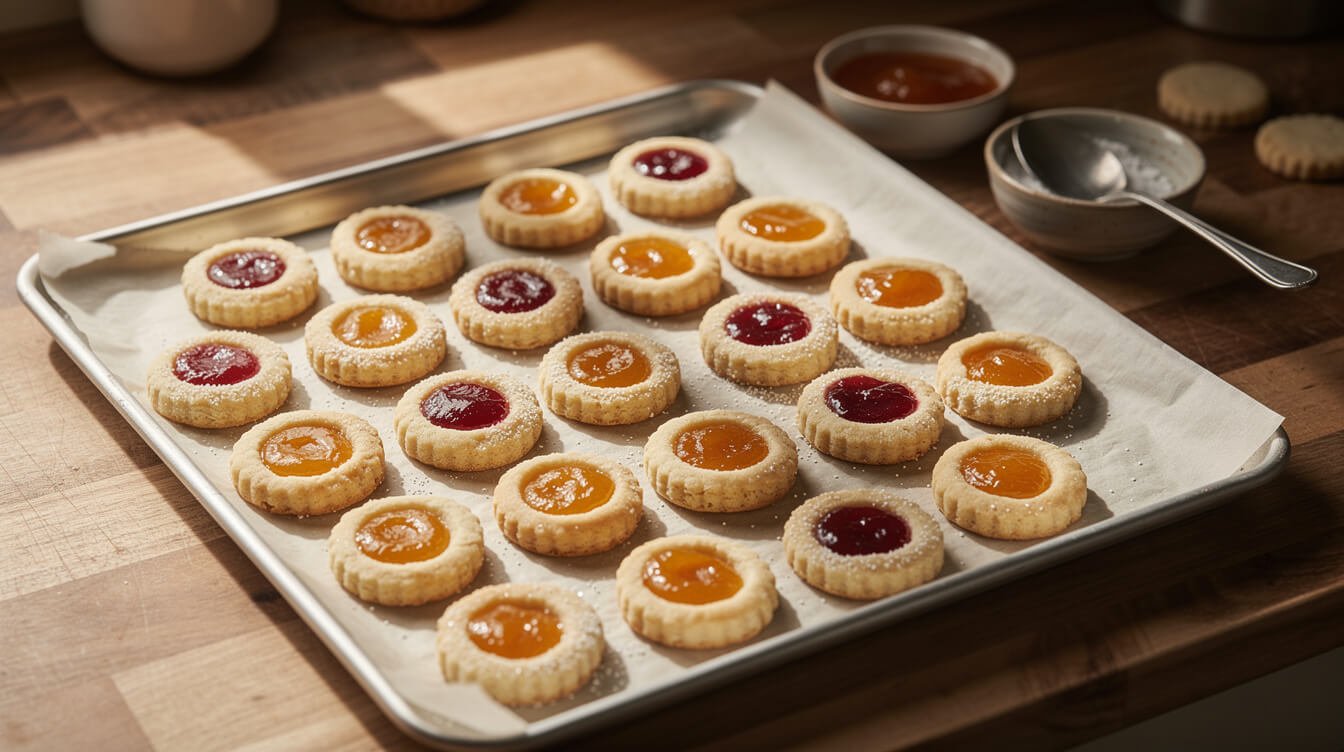
This recipe makes about 36 cookies from 1-tablespoon balls. Hands-on time is about 30 minutes, plus a 30-minute chill. They’re a shortbread-style cookie: crisp at the edges, soft and sandy in the middle, and not too sweet, so the jam gets to be the star.
For the cookies
- 1 cup (2 sticks, 226g) unsalted butter, softened but still cool
- 2/3 cup (133g) granulated sugar
- 2 large egg yolks, at room temperature
- 1 teaspoon vanilla extract
- 1/4 teaspoon almond extract (optional, but it’s lovely with raspberry and cherry)
- 1/2 teaspoon fine salt (use 1/4 teaspoon if your butter is salted)
- 2 1/4 cups (280g) all-purpose flour, spooned and leveled
For filling and finishing
- About 1/2 cup (160g) thick jam or seedless preserves: raspberry, apricot, strawberry, or cherry
- 1/4 cup (50g) granulated or sanding sugar, for rolling (optional)
- Optional glaze: 1/2 cup (60g) powdered sugar, 2 to 3 teaspoons milk, and a drop of vanilla or almond extract
Why only yolks, and no baking powder
Thumbprint recipes are all over the map on eggs. Some use none, some use a whole egg, and some use one egg plus a yolk. Here’s what each one does to the cookie, and why this recipe lands on two yolks.
- No egg gives you the most tender, shortbread-like cookie, but the dough is crumbly. It tends to crack around the edges when you press the well.
- A whole egg adds water and the protein in the white. The cookie comes out puffier and more cake-like, and that puff is exactly what closes up the dent in the oven.
- Yolks only add richness and a little binding without the extra water. The dough is smooth enough to press without splitting, and the cookie stays low and tender.
There’s no baking powder or baking soda either, on purpose. Leavening makes cookies rise and spread, which is what you want in a chocolate chip cookie and the opposite of what you want here. A thumbprint should hold the shape you gave it.
One more ingredient note: the flour amount matters more than usual. Scoop the cup straight into the bag and you can end up with 20% extra flour, which is the number one reason thumbprint dough cracks. Spoon it into the cup and level it off, or weigh it. If you’re unsure about salted vs unsalted, here’s when it actually matters and how to swap.
How to make thumbprint cookies with jam, step by step
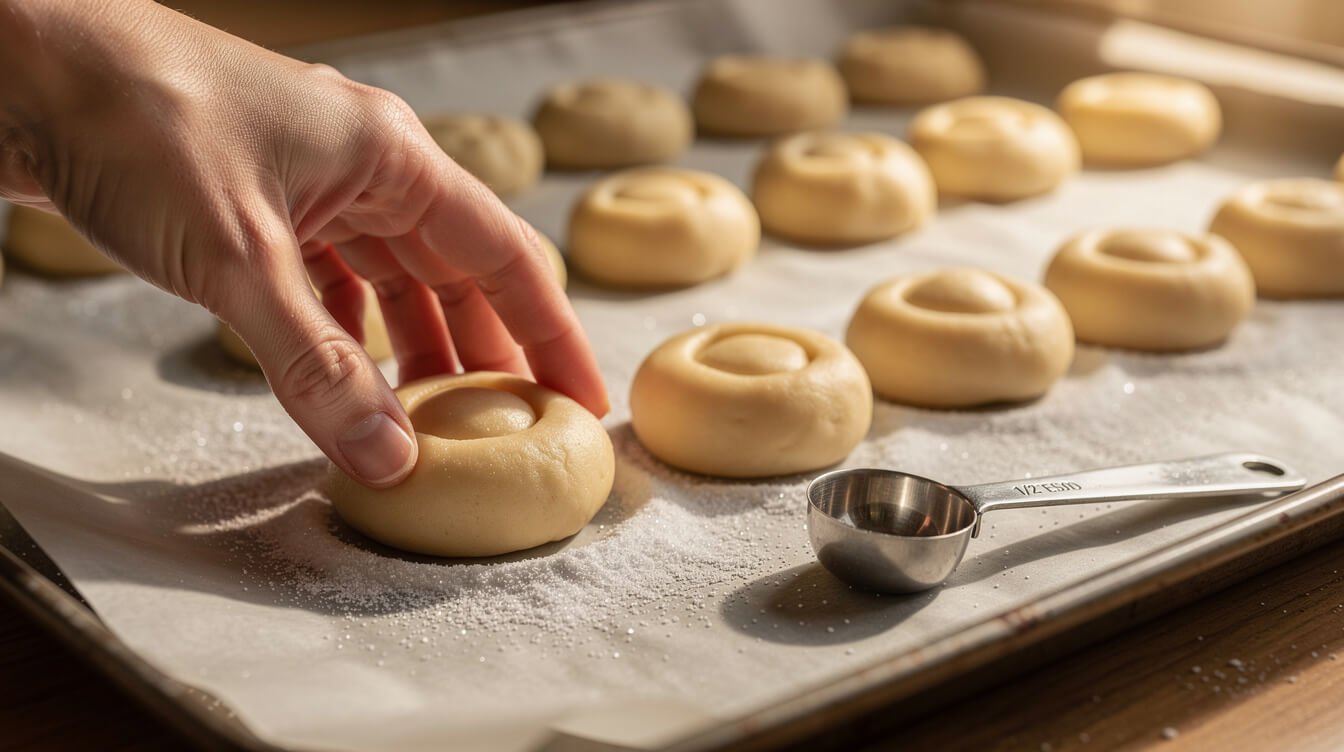
The method below uses what we call the two-press trick. You make the dent before chilling, then press it again halfway through the bake and add the jam then. It takes about 30 extra seconds per tray, and it fixes the two biggest problems at once: dents that puff shut, and jam that boils over and goes dark.
- Heat the oven and prep the pans. Heat the oven to 350°F (175°C) with a rack in the center. Line two baking sheets with parchment.
- Cream the butter and sugar. Beat the cool, softened butter with the sugar on medium speed for about 2 minutes, until it’s pale and creamy. Don’t go much longer. You’re not trying to whip in lots of air here.
- Add the yolks and flavor. Beat in the yolks, vanilla, almond extract (if using), and salt until smooth, scraping the bowl once.
- Add the flour. Mix on low just until the dough comes together and no dry streaks remain. It should feel like soft play dough: smooth, not sticky, and not crumbly. If it’s crumbly, mix in 1 to 2 teaspoons of milk.
- Roll smooth balls. Scoop level tablespoons (about 18 to 20g each) and roll them between your palms until the surface is completely smooth. Any crease you leave now is where a crack starts later. Roll in sugar if you like the sparkly finish.
- Make the first press. Set the balls about 1 1/2 inches apart on the sheets. Press a well into each one with your thumb, a knuckle, or the rounded back of a 1/2-teaspoon measure. Go about halfway down, slowly. If the edges split, pinch them back together.
- Chill for 30 minutes. Put the trays in the fridge. Cold dough holds its shape in the oven instead of slumping.
- Bake for 8 minutes. The cookies will look set at the edges and still pale, and the dents will have puffed up a little.
- Make the second press and fill. Pull the tray out (close the oven door behind it so you don’t lose heat). Use oven mitts, because the tray is hot. Re-press each dent gently with the back of the 1/2-teaspoon measure. Then fill each one with about 1/2 teaspoon of jam, level with the top, not mounded.
- Finish baking for 6 to 8 minutes. They’re done when the bottoms are lightly golden and the tops look dry and matte, not shiny. The tops should stay mostly pale.
- Cool on the pan, then move. Let them sit on the sheet for 5 minutes. They’re fragile when hot. Then move them to a rack. The jam sets as it cools, which takes about 30 minutes to an hour.
- Glaze if you like. Once they’re completely cool, whisk the powdered sugar with just enough milk to make a drizzle. Then zigzag it over the cookies with a spoon or a snipped zip-top bag.
The simpler way, if you’d rather
You can also fill the dents before the cookies go in the oven and bake them for 14 to 16 minutes straight through. That works fine with a very thick jam. You’ll just get a shallower well, and slightly darker jam at the edges. If you’ve got a big batch and limited patience, that’s a fair trade. Nobody at a cookie swap is measuring dent depth.
A light-colored aluminum sheet bakes these most evenly. Dark pans brown the bottoms before the tops are done. If you’re shopping for one, our guide to the best baking sheet covers what size and metal to get.
Which jam works best (and how to keep it from running or boiling over)
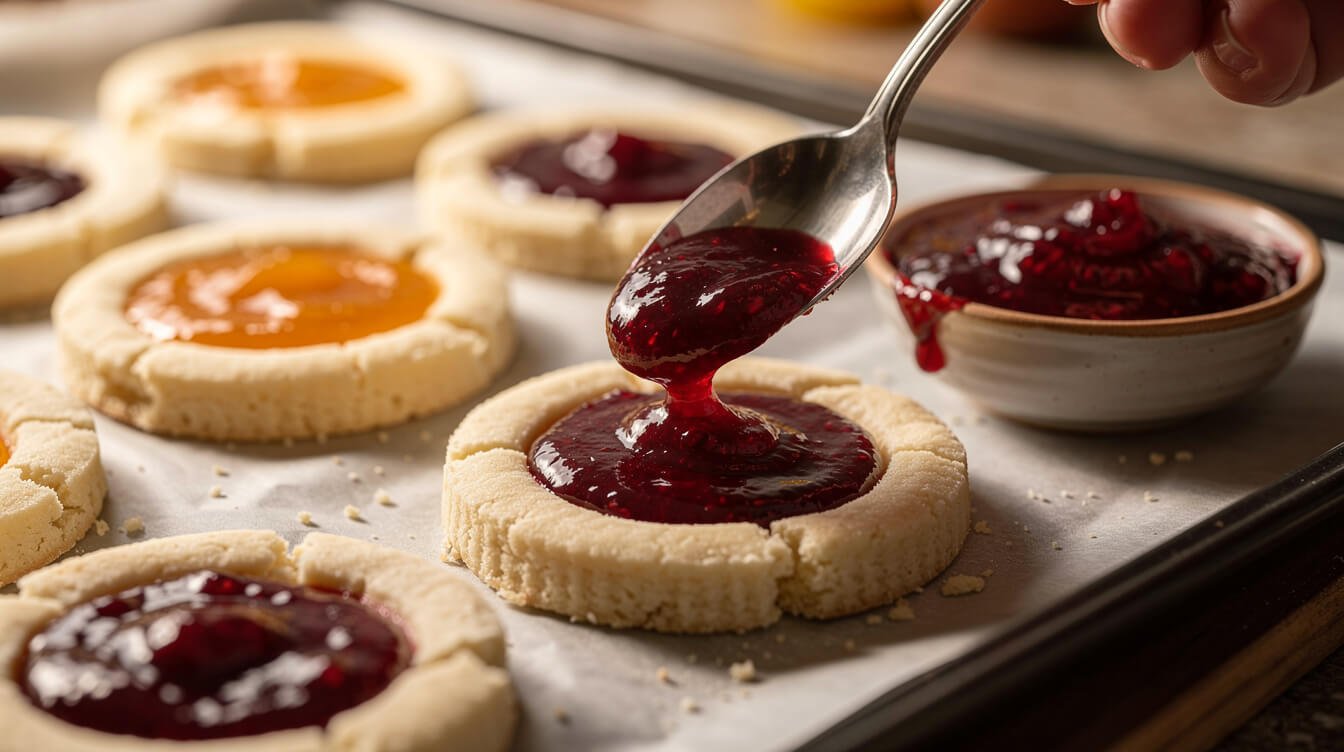
The filling is half the cookie, and not every jar behaves the same way in a hot oven. The rule is simple: the thicker the filling going in, the neater it comes out. Thin fillings get thinner as they heat, then bubble up and over the edge.
| Filling | How it bakes | Tips |
|---|---|---|
| Seedless raspberry jam | Holds well, sets glossy, and gives the classic bright red center | Our first pick. Stir it smooth before using. |
| Apricot jam or preserves | Sets firm, with a golden color that looks great next to the red ones | If it’s chunky, blend it or press it through a sieve. |
| Strawberry jam | Good, but often a little looser | Pick a thick brand, or thicken it (see below). |
| Cherry or blackberry preserves | Deep color and great flavor, but has fruit pieces | Chop the fruit fine or blend it so it fits the small well. |
| Jelly | Thins out the most when hot and can run over the side | Use a smaller amount, or thicken it first. |
| Low-sugar fruit spread or homemade jam | Often looser and wetter, so it spreads and can soak the cookie around it | Thicken it first, and bake these close to the day you serve them. |
How to thicken a runny jam
Put about 3/4 cup of jam in a small saucepan. Simmer it over medium-low heat, stirring, for 3 to 5 minutes, until it’s reduced a bit and coats the spoon thickly. Let it cool completely before you use it. It thickens more as it cools. Warm jam in a cold cookie is a recipe for a soggy center.
How much to use
About 1/2 teaspoon per cookie, filled level with the rim. It’s tempting to mound it up. Don’t. A heaped dome of jam boils over in the oven every time, and it leaves a sticky ring on the parchment and a bare dent in the middle. A small spoon or a zip-top bag with the corner snipped off gives you the most control.
Stiff jam straight from the fridge?
Stir it hard in a bowl for 20 seconds, and it’ll loosen enough to spoon. If it’s still too stiff, microwave it for 5 seconds at a time just until it’s spoonable, not hot. Then let it cool for a minute before filling.
Why thumbprints crack, spread, or lose their dent (and the fixes)
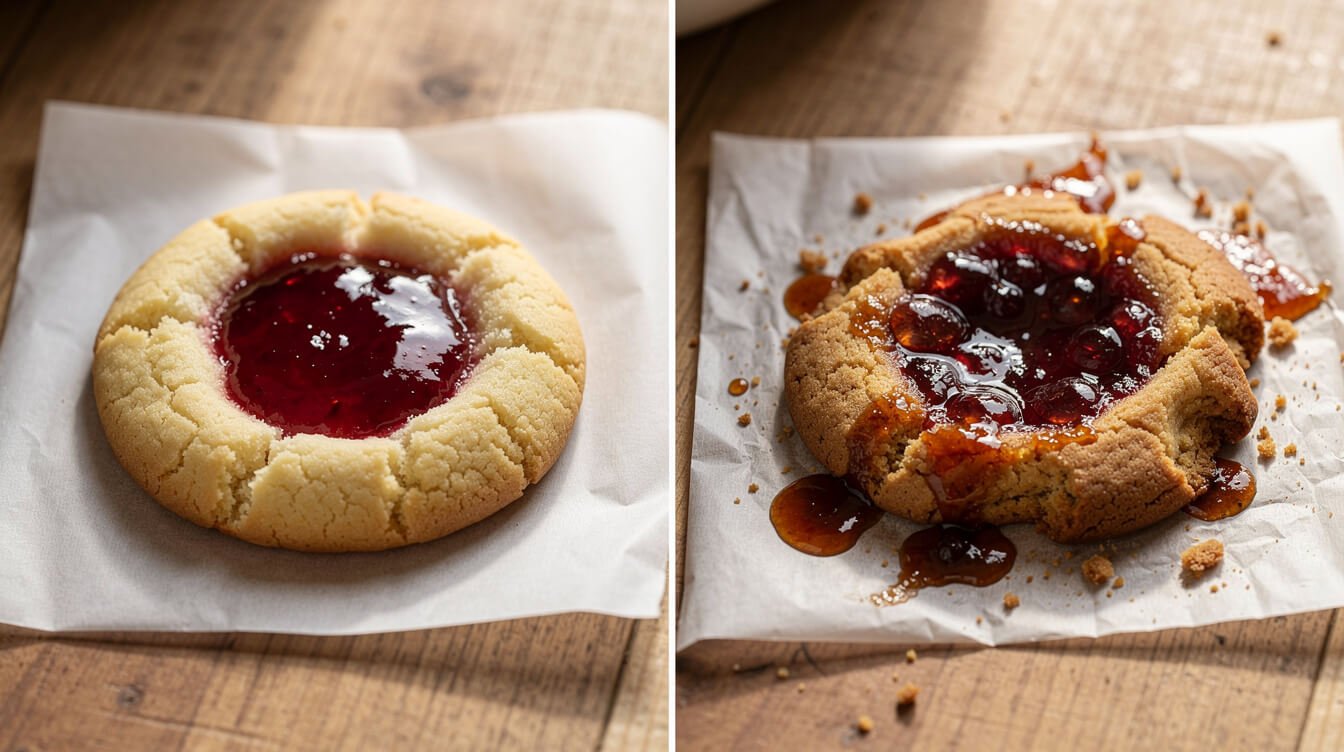
Thumbprints only have three ingredients doing most of the work: butter, sugar, and flour. So small changes show up fast. If yours didn’t come out the way you pictured, find the problem below. It’s usually one of these.
| What happened | Most likely cause | The fix |
|---|---|---|
| Cracks around the edge when you press | Too much flour, dough too cold, or pressing too fast | Spoon and level or weigh the flour. Press while the dough is soft, before chilling. Pinch cracks closed. |
| Cracks that open in the oven | Creases left in the ball when rolling | Roll each ball until it’s completely smooth before you press. |
| Cookies spread flat | Butter too warm, dough not chilled, or a hot pan | Use butter that’s soft but still cool. Chill 30 minutes. Always load cookies onto a cool sheet. |
| The dent puffed shut | Whole egg or leavening in the dough, or a shallow first press | Use yolks only, skip baking powder, press halfway down, and re-press at the 8-minute mark. |
| Jam bubbled over the sides | Too much jam, or a thin jam | Fill level, not mounded. Thicken loose jam first. |
| Jam turned dark or sticky-hard | Jam was in the oven for the whole bake | Use the two-press method and add the jam halfway through. |
| Bottoms too brown, tops raw-looking | Dark pan or rack too low | Use a light aluminum sheet with parchment, center rack. |
| Dry, crumbly, sandy texture | Too much flour or overbaked | Weigh the flour (280g). Pull them when the bottoms are just golden. |
| Cookies taste bland | Not enough salt, or a sweet, flat jam | Don’t skip the salt. Try the almond extract, or a tart raspberry or apricot jam. |
| Centers went soggy the next day | A wet, low-sugar or homemade jam | Thicken the jam first, and bake those the day you serve them. |
The hot-pan problem
This is the sneaky one. If you’re baking in batches and you load the next round of dough onto a sheet that just came out of the oven, the butter starts melting before the cookie has a chance to set. You get a flat, greasy edge and a dent that slides off to one side. Let the pan cool completely, or rotate between two or three sheets.
If your kitchen is warm
Holiday kitchens with the oven running all day get warm fast, and this dough softens quickly. If the balls start looking shiny or slumping while you roll, put the bowl back in the fridge for 10 minutes. It’s the same trick that keeps cut-out sugar cookies from losing their shape.
And if you’re baking a few dozen of these for friends this year, our Eat Cafe Support Our Charities Donor Membership T-Shirt is a comfortable black tee to bake in, and buying one supports the cause.
From the Eat Cafe kitchen
One good recipe a week, straight to your inbox
The recipe we're actually cooking this week, plus the one tip that saves it when it goes sideways. No spam. Unsubscribe anytime.
Swaps and variations: sugar, nuts, glaze, egg-free, gluten-free, and other fillings

Once you’ve got the base dough down, thumbprints are one of the easiest cookies to change up. Here’s what works, and what to watch for.
Rolled finishes
- Sanding sugar: Roll the balls in coarse or colored sanding sugar before the first press. It gives a pretty, crunchy outside, and it doesn’t melt away in the oven like fine sugar can.
- Finely chopped nuts: Walnuts, pecans, or almonds make a classic version. Dip each ball lightly in beaten egg white, then roll it in very finely chopped nuts, then press. Big pieces fall off and make the well lumpy, so chop them small.
- Coconut: Sweetened flaked coconut toasts golden in the oven and is great with apricot or pineapple jam. Chop the flakes a bit so they stick.
If you roll in nuts or coconut, label them on a cookie tray. More on that in the storage section.
Flavor swaps for the dough
- Citrus zest: Add 1 teaspoon of orange or lemon zest with the sugar. Orange goes well with raspberry, lemon with blueberry or apricot.
- Brown butter: Brown the butter, then chill it back to soft-solid before creaming. It’s nutty and rich, but the dough is a bit drier, so you may need the extra teaspoon of milk.
- Cream cheese: Swap 4 tablespoons of the butter for 2 ounces of cream cheese for a softer, tangier cookie. Store these in the fridge if you won’t eat them within a day.
Egg-free thumbprints
Skip the yolks and add 1 to 2 tablespoons of milk, just enough to bring the dough together. The cookie is a little more crumbly and more like classic shortbread. Press slowly, and pinch any cracks back together. If you’re baking for someone with an egg allergy, check the labels on everything else, too, and keep their batch separate.
Gluten-free thumbprints
A good 1:1 gluten-free flour blend that contains xanthan gum works well here, swapped by weight (280g). Because there’s no rise to support, thumbprints are one of the friendlier cookies for gluten-free baking. If you’re baking for someone with celiac disease, check every label (including the jam and sanding sugar). Use clean bowls, pans, and parchment.
Other fillings
Thick fillings like jam can bake in the cookie. Softer ones should go in after baking. Bake the cookies unfilled, re-press the dents while they’re still warm, let them cool, then fill.
- Chocolate: Spoon in melted chocolate or chocolate hazelnut spread after baking. Let them set at room temperature.
- Caramel: Fill thick store-bought caramel sauce after baking, then add a pinch of flaky salt.
- Lemon curd: Fill after baking. Lemon curd is made with eggs and butter, so these need to live in the fridge.
If you’re building a whole tray, the same dough-and-press thinking shows up in our peanut butter blossoms, where the timing of the press makes or breaks the cookie.

A shirt for a long day of cookie baking
The Eat Cafe Support Our Charities tee is a sturdy, comfortable black cotton shirt with a small logo over the heart and a big one on the back. It’s easy to wear through a weekend of rolling and pressing, and it makes a nice add-on to a cookie tin for the baker on your list.
Make ahead, freeze, store, and pack them for a cookie tray
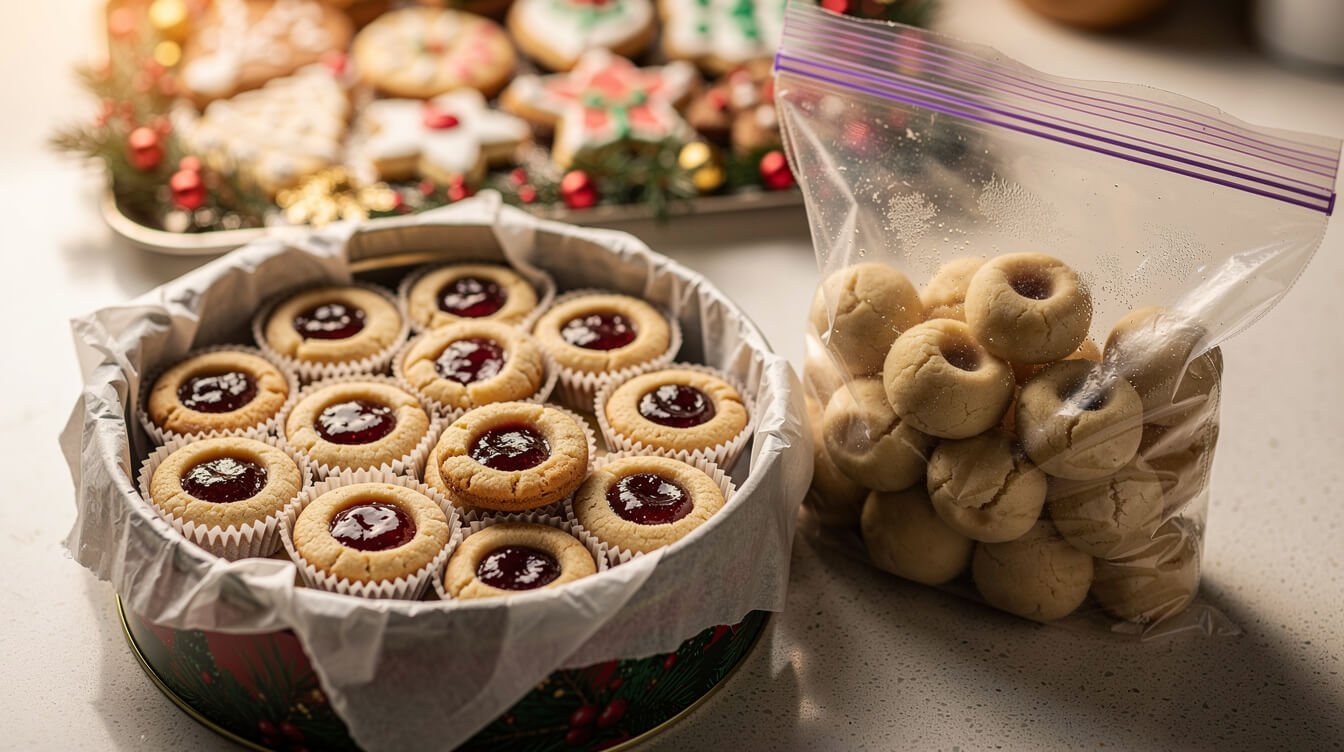
Thumbprints are one of the best make-ahead holiday cookies, as long as you freeze them at the right stage.
Freeze the dough (best option)
Roll the balls and make the first press. Then freeze them on a tray until they’re firm, about an hour. Move them to a freezer bag and keep them up to 3 months. Bake from frozen, without thawing. Give them 9 to 10 minutes before the second press, then fill and finish as usual. They’ll need a minute or two longer overall. Freezing the dough unfilled means the jam always goes in fresh, and they taste just-baked.
Freeze baked cookies
You can freeze baked, filled cookies for about 2 months. Freeze them in a single layer first, then stack with parchment between layers in an airtight container. Thaw them at room temperature in the container, so the condensation lands on the outside and not on the cookies. The jam can turn a little sticky or dull after thawing. A light dusting of powdered sugar or a fresh drizzle of glaze fixes the look. Glaze is best added after thawing, not before freezing.
Store at room temperature
Store jam-filled thumbprints in an airtight container at room temperature for up to about 5 days. Keep them in a single layer, or put parchment between the layers, because the jam stays slightly tacky. They’re at their best in the first 2 or 3 days. After that, the cookie around the jam slowly softens. Cookies filled with lemon curd, or made with cream cheese in the dough, go in the fridge.
Packing them for a tray, swap, or gift
- Pack thumbprints in a single layer, or in mini paper liners. That way the jam doesn’t stick to the cookie next to it.
- Keep them away from crisp cookies like gingerbread in a shared tin. The moisture from the jam can soften their neighbors.
- If any are rolled in nuts or coconut, or made with peanut butter, label the tray, for example “contains walnuts.” A shared tin means cross-contact, so if someone has a nut allergy, ask them what’s safe instead of guessing.
- Baking for a cookie swap? Make the dough a few weeks ahead and freeze it. Then bake 1 or 2 days before the swap.
Planning a whole spread? Our easy Christmas cookie ideas include a full make-ahead baking plan. Thumbprints slot right in next to soft gingerbread molasses cookies and snickerdoodles.
Thumbprint cookies with jam FAQ
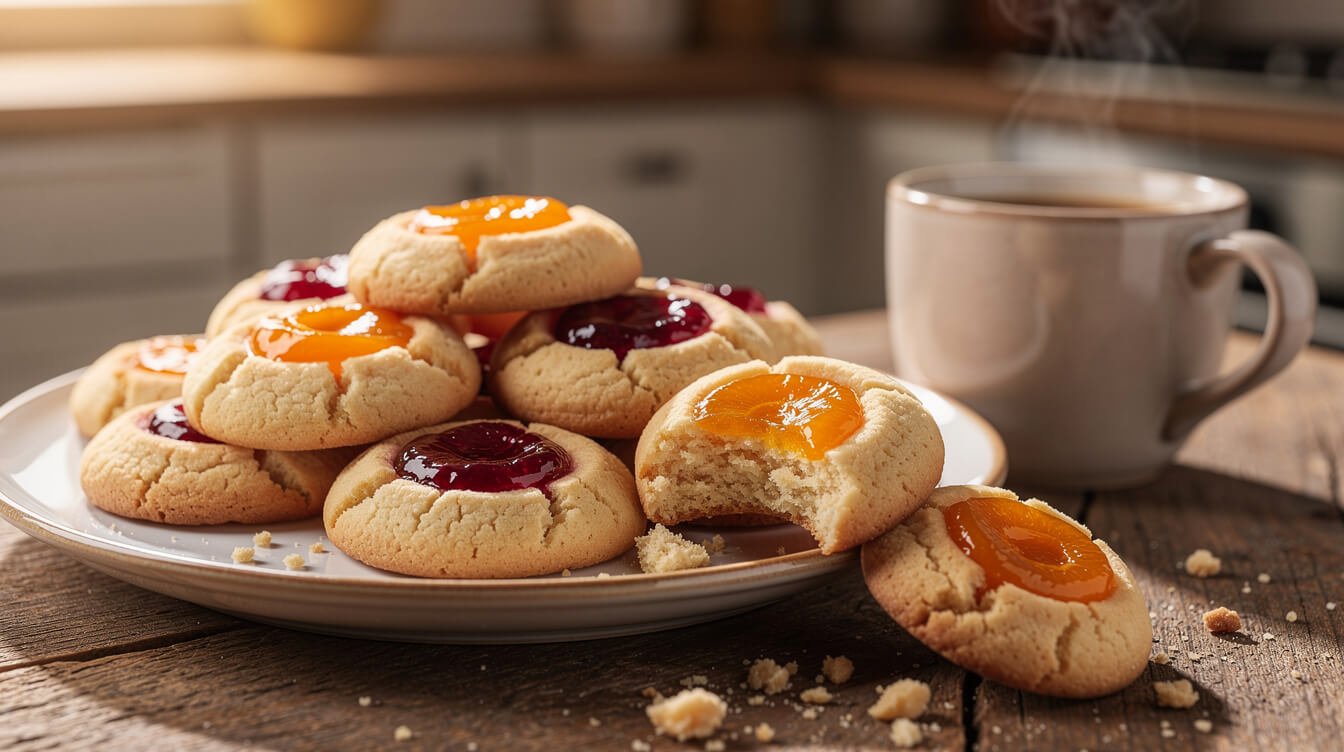
Should I add the jam before or after baking?
For the neatest thumbprint cookies with jam, add it halfway through the bake, at the 8-minute mark, right after the second press. Filling them before baking also works with a thick jam. Filling after baking is best for soft fillings like curd, caramel, or chocolate.
Can I use jelly instead of jam?
Yes, but jelly thins out the most in the oven and can run. Use a little less, fill after the second press, or simmer it for a few minutes first to thicken it.
Do I have to chill the dough?
Chilling the pressed balls for 30 minutes is what keeps them from spreading and keeps the dent deep. If your kitchen is cool and the dough is firm, you can get away with 15 minutes. Don’t skip it if the dough feels soft or shiny.
Why did my thumbprints come out cakey?
Usually that’s a whole egg or baking powder in the recipe. Both make the cookie puff. This recipe uses yolks only and no leavening, for a tender, shortbread-style cookie.
What can I use instead of my thumb?
The rounded back of a 1/2-teaspoon measuring spoon makes the most even dents. The handle end of a wooden spoon works too. Dip whatever you use in a little flour if it sticks.
Can I taste the dough?
Not this one. It has raw flour and raw egg yolks, and the FDA’s advice is to never eat raw flour, dough, or batter. Wait for the baked cookie.
Can I make them bigger?
You can use 2-tablespoon balls, which give you about 18 cookies. Bake them for 10 minutes before the second press, fill with about 1 teaspoon of jam, then bake for another 7 to 9 minutes.
How far ahead can I bake them for a party?
Up to 2 or 3 days ahead for best texture, stored airtight in a single layer. For anything further out, freeze the dough and bake closer to the day.
The short version
Here’s the whole thumbprint cookies with jam recipe on one screen:
- Use cool, softened butter, 2 egg yolks (no whites), and no baking powder. Spoon and level the flour, or weigh it (280g).
- Roll completely smooth 1-tablespoon balls, press a well halfway down, then chill 30 minutes.
- Bake at 350°F (175°C) for 8 minutes. Re-press the dents and add 1/2 teaspoon of thick jam, filled level.
- Bake 6 to 8 minutes more, until the bottoms are lightly golden. Cool 5 minutes on the pan.
- Thicken runny jam or jelly first. Don’t mound the filling.
- Freeze pressed, unfilled dough balls up to 3 months. Store baked cookies airtight in a single layer for about 5 days. Label any nut-rolled ones.
- Never eat the raw dough.
Want another cookie where the jam stays put? Try our rugelach recipe. It’s the same buttery, jam-filled idea, with a cream cheese dough and five rules for leak-proof filling.

Before you go
Want the next one?
We post a new recipe or kitchen guide every day. The best of the week lands in one short email, no life story attached.